Sharing the landscape with bears is one of the most profound parts of living and playing in the Sea to Sky corridor. Whether you are navigating the mossy old-growth around Whistler (like Cheakamus Lake) or heading deeper into the backcountry, encountering a black bear or a grizzly is a reminder that we are guests in a very old, very active ecosystem. For families, “Bear Awareness” isn’t about fear; it’s about competence. It’s about building a set of habits that allow us to move through the mountains with respect and minimal impact. Here is the essential framework for staying safe in bear country.
Credit: Topazladygem on Flickr
The Prevention Mindset: Don’t Be a Surprise Bears generally want as little to do with you as they do with a noisy leaf blower. Most “aggressive” encounters are actually defensive reactions to being startled.
Make Meaningful Noise: Forget the bear bells—they are often too quiet to be effective. Use your voice. Call out “Hey Bear” periodically, especially near rushing water, in dense brush, or when moving against the wind.
The Group Shield: Keep the family together. For a bear, a group of four people is a large, intimidating presence. For kids, make it a game: “No one gets further than a ‘high-five’ distance away” when in thick cover.
Situational Awareness: Ditch the earbuds. You need to hear the snap of a branch or the “woof” of a bear before you see it. Look for scat, turned-over logs, or marks on trees.
Bear Spray is Non-Negotiable
If you are on a trail in the Sea to Sky, you should be carrying bear spray. It is a highly effective, non-lethal tool, but it is only useful if it’s accessible.
Placement: Do not put it inside your pack. It belongs in a holster on your hip or your pack’s shoulder strap. You have roughly 2–3 seconds to react in a charge; you won’t have time to dig through your bag.
Know the Reach: Most sprays have a range of about 5 to 9 meters. Understand that wind will affect the cloud.
Practice: Buy an inert “practice can” to understand the trigger mechanism and the force of the spray without the risk.
The Encounter: Calm is Contagious
If you do see a bear, your primary job is to remain the “calm adult” in the room. Your children will mirror your energy.
Stop and Assess: Do not run. Running triggers a predatory chase instinct.
Identify Yourself: Speak in a low, calm, firm voice. This tells the bear you are a human and not a prey animal.
The Slow Retreat: Back away slowly, keeping the bear in your sight but avoiding direct, aggressive eye contact. Give the bear a clear exit route.
Pick Up Small Children: Do this immediately to prevent them from running or making high-pitched noises.
Quick Identification: Black Bear vs. Grizzly
Feature
Black Bear
Grizzly Bear
Profile
Straight face profile
“Dished” or concave face
Shoulders
No prominent hump
Distinctive muscle hump
Ears
Large, pointed
Short, rounded
The Camp: Attractant Management
A “fed bear is a dead bear.” In the Sea to Sky, our bears are highly intelligent and opportunistic.
The 100-Meter Rule: If you are backcountry camping, cook and store food at least 100 meters away from where you sleep.
Zero Trace: This includes “organic” trash like apple cores or orange peels. These scents draw bears to trails, creating “food-conditioned” animals that eventually have to be destroyed by conservation officers.
Storage: Use bear-proof lockers where provided, or a proper bear canister. If you’re hanging food, it needs to be 4 meters high and 2 meters out from the tree trunk.
The Big Picture: Respect over Fear We don’t go into the mountains to conquer them; we go to participate in them. Teaching your kids how to handle a bear encounter is an analog skill that builds confidence and stewardship. It turns a “scary” animal into a respected neighbor. For more deep dives into mountain safety and family logistics, check out the rest of our Sea to Sky Family Navigator series. Have you had a bear encounter while out with the kids? How did you handle it? Let’s keep the conversation going below.
Note: This trail is currently undergoing maintenance, with the reopening scheduled for summer 2026.
There are very few places you can visit where its residents live over 10 times longer than humans. Cheakamus Lake is a step into the ancient. The stillness here carries a weight; the striking feeling that the life around you existed long before you arrived, and will remain long after. The forest starts on the lower slopes of Whistler mountain, extending far into the wilderness where few humans have ever set foot.
Quick Stats:
Difficulty: Easy/Moderate (Mostly flat, but long for small legs).
Best For: Families seeking old-growth immersion without a massive climb.
Seasonal Note: The road is usually snow-free from late May through October. In early June, the forest is at its most vibrant and “mossy.”
The Trail In
The trail starts at the end of the Cheakamus Lake Road, a 8km winding road that you take from the highway at the first lights when you get to town from the south. The road can get dusty in the summer, so watch your speed.
From the parking lot, it’s 3km to the lake. The first 1km is probably the steepest and most un-interesting as the area has been logged in the past. But once you hit the old-growth forest (and you’ll know when you do), it’s a surreal feeling. You step through a curtain of boughs to enter a biome that is teeming with life energy—if you’re willing to slow down to listen.
The Forest
The sheer size of these trees is what stands out the most. Very few people have actually spent time in an ancient forest, and it shows. I firmly believe that the more time people spend in forests like these, the less disharmony we would all have.
Nice spot for a snack!
Arriving at the Lake
About 1km from the lake, you begin to see the Cheakamus River that the lake feeds. That is the sign that you are close. Several branches of the trail get close to the river, but with little ones you’ll still want to stay a ways away for their safety. But soon enough, you will see the first view of the lake; and what a view it is.
The stunning turquoise hues come from the silt that the glaciers grind up, known as “glacial flour”. On a sunny day it refracts the light to a vibrant display that is much more stunning in person than any photo could capture.
The backdrop behind the lake showcases the wilderness of Garibaldi Provincial Park; an untamed backcountry area that is legendary for mountain exploration, given how close to civilization it actually is.
As beautiful as the lake is, it’s also extremely cold. The same glacier melt that causes the bright hues is also just above freezing…. so even on a hot day it’s a quick in-and-out to say you’ve done it type of thing. There are plenty of non-glacier lakes near Whistler to hang out at if you want to spend some time in the water.
The trail continues to wind around the lake to the far end; but after that, you’re on your own. If you’ve made it this far with kids, it’s probably a good time to head back. That is, unless you’re camping!
Camping at Cheakamus Lake
There are two campgrounds at Cheakamus Lake, both require reservations in advance. They have some cleared ground, a food cache, and outhouses, but not much else. If you have a wagon that would make things easier to haul stuff in—especially with kids.
But the experience you have at these sites is vastly different from the more glitzy frontcountry campsites that BC parks operates. Many times (especially mid-week or the offseason), your group will be the only ones there.
That solitude comes with a responsibility though. Cheakamus Lake is black bear habitat, and while encounters are rare, the odds go up tremendously if you leave food out. Once a bear becomes conditioned to human food, they will seek it out, and become aggressive. This is what the food caches are for. So make sure that you use them if camping out.
Helpful Info
Getting There & Parking
Access: Turn off Highway 99 at the Cheakamus Lake/Function Junction intersection. Follow Cheakamus Lake Road for 8km.
Road Conditions: It’s a gravel forestry road. While generally fine for 2WD vehicles, it’s notorious for “washboard” ripples and potholes. Take it slow, especially if the kids are prone to carsickness.
Parking: The lot is at the very end of the road. It fills up early on sunny weekends, so aim to arrive before 9:30 AM or after 3:00 PM for the “golden hour” light.
Permits & Fees
Day-Use Passes: For the 2026 season, BC Parks requires a free day-use pass to park here from mid-June through mid-October. You can reserve these starting at 7:00 AM two days before your visit at the BC Parks website.
Camping Fees: If you’re staying overnight, reservations are mandatory year-round. It’s $10 per adult and $5 per child (6–15) per night, plus a small reservation fee.
No Dogs Allowed: Since this is Garibaldi Provincial Park, pets aren’t permitted on the trails or in the campgrounds to protect the local wildlife.
Timing the Adventure
Trail Distance: It is a flat 3km (1.8 miles) from the parking lot to the first lake access point (Cheakamus Lake Campground).
Budgeting Time: * The “Hiker” Pace: 45 minutes each way. • The “Family” Pace: Budget 1.5 to 2 hours each way. This accounts for the “First Kilometer” climb, stopping to look at the massive Douglas Firs, and the inevitable “I found a cool rock” breaks. • Full Experience: Plan for 4–5 hours total if you want to enjoy a picnic and some shoreline exploring.
What to Pack
The “Lake Layer”: Even if it’s 25°C in Whistler, the lake creates its own microclimate. Bring a light windbreaker or fleece for when you reach the shore.
Bear Safety: This is active Black Bear country. Carry bear spray in an accessible spot (not buried in your pack) and make sure the kids know to stay close and keep the “chatter” up while walking. More information on how to be Bear Aware.
Water & Food: There is no potable water at the trailhead or the lake. Bring a filter if you’re camping, or pack at least 1.5L of water per person for a day trip.
Footwear: The trail is wide and “wagon-friendly” (if you have one with rugged off-road wheels), but roots can be slippery. Sturdy sneakers or hiking shoes are better than flip-flops.
A Note on Respect
This trail goes through some of the last accessible old-growth forest in British Columbia. It’s a sad, sobering statistic, but one that ushers even more urgency that we need to protect this area from harm. This means following Leave No Trace principles, and staying on the trail.
It also means respecting other people’s desire to be in nature and leaving loud speakers at home, packing out what you pack in. As the saying goes: Take only photographs, leave only footprints.
Good stewardship helps set a good example for our children, so that they grow up doing the same. Eventually that energy will spread, and hopefully our society will begin to value places like these more. That is our hope, at least.
Enjoy This Place of Wonder
Hiking to Cheakamus Lake is one of the best activities for families in Whistler, and one I have been showing my kids since they could barely see past the ends of their noses. They absolutely love it, and so do us parents. It’s a place I often take people visiting to help immerse them in the power and beauty of an old-growth forest.
Yes, the lake is a nice photogenic destination on the hike, but to me, it’s all about that feeling you get when you walk into the ancient forest. It’s hard to describe in words, but it’s a feeling that you can’t get out of you and sticks with you. And in doing so, hopefully it reinforces a desire to make sure places like this can thrive for many more generations and centuries to come.
Want to Find More Hiking Spots? Check Out Our Free App
We made an app to help families navigate the Sea to Sky corridor a bit better. Check out the Sea to Sky Family Navigator app to plan your trip and find spots based on map, activity, location, and more! The best part, it’s free!
Shannon Falls is an easy stopover while going up the Sea to Sky Highway. The massive falls are just minutes from the parking lot, and will give you a glimpse of the massive scale of the Coast Mountains up close. Why Stop at Shannon Falls The park sits right on the Sea to Sky Highway… Read more: Shannon Falls: The Family Guide to This Sea To Sky Staple
Once in a while, you get to test a totally new innovation and see how it stacks up to the establishment it claims to be beating. I’ve just spent the past three months testing out the Unrestricted cooler on our family adventures: hiking, camping, and biking around the Sea to Sky region of British Columbia.… Read more: The Dometic Backpack Is the New Kid on The Block and A Bit Cooler than Others
Heads up: This guide contains affiliate links. If you buy through one, we may earn a small commission at no extra cost to you — it helps keep our guides free. It never changes our picks or their order. Read our Gear Review Policy. Even if we had all the money in the world, we’d… Read more: Splurging at the Fairmont Chateau Whistler
For all the obvious reasons and the fresh air fun, duhh. But maybe it ain’t so obvious when you think of all the work involved, I certainly am no stranger to that all too familiar heavy hurdle. And sure, you can get a good dose of the outdoors by simply going for a walk, hike, picnic, beach day etc., but to really feel the benefits of nature, to feel the weight lift, our family likes to spend some solid time without a solid roof over our heads.
We have a blessing in life to live near one of the great parks in Metro Vancouver: Whytecliff. At the very edge of the continent, where the mainland of BC separates Howe Sound from the Salish Sea. There sits a small peninsula surrounded by multimilllion dollar estates, but with a significant portion of it made public for all to enjoy.
Of all the parks to encapsulate coastal British Columbia, Whytecliff may be it. There are other marquee parks throughout Metro Vancouver, but nowhere else can you get a beach, rocky cliffs, a renowned scuba-diving site, and forested hikes all in one area. It’s marks the beginning of the Sea to Sky region, and is well worth a visit if you’re in the area.
Whytecliff Park At a Glance
Location: End of 7000 block Marine Drive, West Vancouver (just west of Horseshoe Bay) Park Size: 15+ hectares Cost: Free entry / Pay parking year-round (West Van residents can get annual pass) Washrooms: Yes — main building 7am–9pm, portable toilets at south lot Concession: Open daily 11am–7pm (burgers, smoked meat, ice cream, housemade snacks) Dogs: Not permitted on trails Transit: Bus 257 Horseshoe Bay Express or 250 from downtown Vancouver (with 1-2k walking after the stop)
Why Families Love This Park
Swimming beach that gets fun wave action from passing BC Ferries
One of Canada’s first Marine Protected Areas, home to over 200 marine animal species — real wildlife, not a zoo!
Playground, tennis courts, playing field, and heated washrooms
Harbour seals are commonly spotted in the water; orcas have made rare appearances
Café on site means you don’t need to pack everything
Whyte Islet: A Tidal Island To Get In Sync With Nature
Out in the bay from the beach at Whytecliff is Whyte Islet. This rocky outcropping is a tiny mountain that starts deep below the surface, revealing the peak of it at water’s edge. Hiking out here provides those who get there with a remarkable view across the Salish Sea toward Vancouver Island.
The view from atop Whyte Islet looking across the Salish Sea to Vancouver Island
The cool thing about Whyte Islet is that it’s a tidal island—meaning at high tide it’s an island, and at low tide it’s a peninsula. This is important in that it makes you have to plan your trip out there, especially if walking out during an incoming tide. There have been many people needing to get help coming back because the path they took ended up underwater.
But fear not, as the tide table is easy enough to read. You can get a fresh tide table on the Candian Government’s DFO website, or check out what it’s doing right now:
The whole exercise of planning for the tides becomes a great lesson to kids to help them (and even us parents) understand the Earth’s natural rhythms a bit better. Knowing the tides is a part of many seafarer’s lives, but something the land lubber in us loses sight of. Flexing that muscle is good for both the brain and the wild heart.
The Playground at Whytecliff
The park has a moderately sized playground which is spread out for different ages to have their own space. Big kids will like the large swing set, but the rest of the equipment is meant for the younger (under 10) set. A small dinosaur-shaped apparatus welcomes the tots, while a larger structure with two slides and a few ways to climb up give our toddlers plenty to be entertained by.
There are also nearby tennis/pickleball courts, and a large field for games—although nothing is level and it all slopes down toward the ocean.
Hiking/Walking Trails
Whytecliff has an impressive array of different trails that have been carved out over time. Depending on how old your kids are you might want to keep them on a short leash; as the trails can get dangerously close to a cliff’s edge. But there are plenty of trails—both near the water and in the forest—that will be both entertaining and challenging for kids and adults alike.
The coastal trails are best explored with grippy soles that can grip to the granite rocks, allowing you to get a little bit further out. But if there are small kids or people with difficulty balancing, you can take a nice paved path down to the waterline, and it just so happens to go past the concession stand. The concession isn’t anything to write home about, but can ease a tantrum if emotions get hot.
The shoreline is full of tidal pools and all kinds of treasures.
For those who crave a bit more exercise, It’s well worth a jaunt across Marine Drive where the park continues up the same ridgeline that juts into the ocean forming Whyte Islet. From there you can easily spend an hour or so getting the heart rate up while at the same time getting immersed in the Douglas Fir, Western Red Cedar, and Coastal Hemlock forest that makes British Columbia stand out. While sweeping vistas may be limited, the forest is the draw, and there’s a reason why the Japanese practice forest bathing: it calms the nervous system and grounds us in our surroundings better than almost anything.
It’s a favorite spot for locals to take their dogs, so just be careful if you have curious little ones that they don’t end up with some discarded dog poo. I always thought it was strange that people bag up their dog poo and leave it on the ground, but maybe in this situation it’s the better option…
The Best Lunch Spot Around
Toward the western edge of the park are a few parking spots if you’re lucky enough to get them, but is a bit like winning the lottery on a hot summer’s day. But right above that is a public area with a picnic table that could be one of the most beautiful lunch spots on earth, and certainly one of Vancouver’s best. There you can whale watch right from the point and see a multitude of birds and seals passing through the channel.
Parking at Whytecliff
Because it’s such an amazing spot, it gets busy, and there are far too few parking spots to meet the demand. The park itself has a few dozen spots with a few more across Marine Drive in the woods.
But none of that matters on a weekend where it can get so busy that they will close down the road at Marine Drive and Nelson Ave in an attempt to curb the congestion. Because of this, we highly recommend getting to the park before 9AM (9:45 at the latest) on weekends in the summer, lest you get turned away.
Come Back Often
Some people may be here for a short time, visting once—and that’s great. I hope this small guide entices you to visit. But the magic comes when you visit Whytecliff across the seasons. There is something unique about each phase of the year: Herring spawn in the spring, Humpback Migrations, Summer beachcoming, and winter storms. The moods of the park will entice you to visit again and see what each season is all about.
Don’t forget to catch the sunset!
Want to Find More Great Spots in the Sea to Sky? Check Out Our Free App
We made an app to help families navigate the Sea to Sky corridor a bit better. Check out the Sea to Sky Family Navigator app to plan your trip and find spots based on map, activity, location, and more! The best part, it’s free!
One of the coolest things about the YETI Camino Carryall bag is the weight capacity. At 300lbs, it stands up to YETI’s reputation for being virtually indestructible. at 30 lbs, that means my toddler is well under the weight limit.
I’d be lying if I said that I didn’t carry her in this bag when times got tough. It’s much easier than dealing with someone who refuses to walk and becomes dead weight in their arms. Plus, she actually likes it and thinks it’s a ride.
And the bag? It’s awesome. We’ve reviewed a bunch of beach bags, and this one wins in the durability department. We use it all the time, both around our home base in Vancouver and at our second home on the North Shore of Hawaii. it is our go-to for beach and pool activities, and after two years, still has every seam in place. Will you and your family like it as much? Read on to find out the good and bad of it all.
We take pride in only recommending products we actually use and enjoy. We never take payments for sponsored posts, but use commissions on referrals to help pay the bills. You can read more about our gear review policy here.
Capacity: 35L, with gear loops for extra storage Handles: Large and small Self-Standing: Yes
Pros: Wide opening, stands on its own, super durable Cons: No ability to seal the top
We live about a five-minute walk to the beach, and even then, it can sometimes feel overwhelming. The best way we’ve found to reduce the overwhelm is reducing the time from “let’s go to the beach” to when we are actually out the door. Having a bag ready and packed has been the game-changer everyone should seek out.
With two toddlers at home, we do need more than others, especially since one is still in diapers. But the beauty of the beach is that it’s one of the world’s best babysitters. So other than snacks, towels, sunscreen, some water, and a change of clothes, you don’t need a whole lot else.
The best part of this bag (in this humble writer’s opinion) is how it keeps its shape and you can toss stuff in and pull them out in seconds. Some may find it too rigid, but we don’t pack this bag away. It’s ready by the door the moment that we decide to go, before anyone has a chance to think twice.
The two internal zip pockets provide excellent shelter for valuables or anything we really don’t want to get wet. It’s not as convenient as the main pocket, but there are two internal pop-out pockets that can house some wet gear, a water (or wine) bottle, or a book to keep you from digging to the bottom when its needed.
We run a pretty lean beach kit and the 35L swallows all of it without complaint. The one thing we don’t house in here is diapers. We keep those in a dedicated fanny pack that lives alongside the Camino, with a small emergency stash tucked into the internal pockets just in case. If you’re not in the diaper stage, you’ll have even more room to play with.
The internal pockets are fine for small items, but don’t expect a lot of organizational structure. This bag is built for throwing things in and pulling them out fast, not for finding your car keys at the bottom.
A radio is a great use case for attaching something to the outside.
The Wide Mouth Problem
Here’s the honest con: it’s not that the bag can’t handle water, it’s that the top is completely open to it. The exterior sheds splashes well enough, but if a wave catches you off guard or someone cannonballs nearby, whatever is sitting at the top is fair game. It’s a trade-off — the same wide mouth that makes packing effortless is the reason you’ll want to be thoughtful about where you set it down at the beach.
The side pockets fold in when used, and are out of the way when you don’t need it.
Different Sizes
We have the 35L version but it also comes in 20L and 50L versions if you want something smaller or larger. Any family larger than 4 might need the larger version. A single adult or a couple will probably do fine with the 20.
Durability and Cleaning
Two years of weekly beach trips and it still looks like itself…mostly. The exterior cleans up well with a rinse, and the top strap has held its shape throughout. It does carry a bit of a lived-in look at this point, but for a beach bag, it would feel out of place if it was spotless. Nobody is buying this to keep it pristine. You’re buying it because it can take a beating and keep showing up.
Is It Worth the Price?
The Camino isn’t cheap, but it lasts. What you’re paying for is gear that doesn’t ask to be babied. If your equipment gets thrown in trunks, dragged across sand, and stuffed full of wet towels on a regular basis, you’ll find the price makes sense over time. A $30 canvas tote will do the job for a season, if you’re lucky. This one just keeps going. The internal zipper pockets are worth it just to keep your valuables from getting destroyed by sand and salt water.
You’ll appreciate the self-standing feature when you have an open bag of snacks!
Final Thoughts
For those with a bit of budget to make beach life easier, we really enjoy the simplicity that the Yeti Camino Carryall Tote adds to our lives. It is one thing to want to go to the beach when the sun comes out, and it’s another thing to get all the pieces together. So if you are the type that is impulsive and spontaneous, you’ll do well with a bag that is ready to go, lasts long, and can carry your kid home when they run out of juice.
The Sea to Sky corridor in British Columbia is a hiker’s paradise. For families with toddlers, the same venues are also the ultimate classroom, playground, device-free, wonder-full venue for our kids to play in.
Our kids are now 2 and 3. They have outgrown the carrier/backpack stage, which actually made things better for mom and dad to get some extra mileage. Nowadays, our hikes are more of a bumble, but that is fine… seeing the world through their point of view is actually an activity that I (and I’m assuming many other parents) find great joy in practicing.
Having lived in the Sea to Sky corridor for over 22 years, I’ve spent a ton of time in these mountains on foot. But none has helped me really understand the ecosystem like a shortened walk for little legs and an in-the-moment attention span.
Sea to Sky Gondola is definitely worth the price of admission.
Our Favourite Hikes With Toddlers in the Sea to Sky
Here are some of our favourite easy, kid-friendly hikes along Highway 99, from Horseshoe Bay to Pemberton and beyond. They each have something unique to offer, with all of them manageable for little legs.
The lovely seaside hamlet of Horseshoe Bay, Where the Sea to Sky Highway begins
Horseshoe Bay: Start of the Sea-to-Sky Highway
Seaview Walk
This is an old road that was reclaimed into a trail, and is a favourite for locals to stretch their legs and walk the dog. The name is spot on and it’s more of a stroller-friendly walk than a hike. But at the far end of the walk by Nelson Creek there is a hike up toward Whyte Lake that is worth the 2-hour detour. It’s a fairly steady ascent to a small pass where the lake sits. The lake isn’t much but the forest and gulleys that you get to after crossing the highway are well worth the exercise for those with carriers, or bigger kids. It might be a lot with toddlers who don’t like backpacks, but if you have a backpack it’s a great workout for the parent!
It’s not a bucket-list destination but is a great stop if you want to break up a road trip before continuing up the Sea-to-Sky highway, or to burn off energy before getting into the ferry lineup.
This park has a large grassy area, a decent sized playground, tennis courts, and a great natural trail system. We do warn that the “cliff” in the park name is not for show — it is a long drop from the cliff’s edge. The good news is that there are plenty of safe access points to the water, including a nice rocky beach with logs and millions upon millions of rocks that one can throw into the ocean.
Murrin Park is right off Highway 99 and one of the best easy hikes near Squamish for families. It’s a perfect stop if there’s heavy traffic heading up the corridor. The trail loops around the lake (about 2km) with ample rock-throwing opportunities along the way, if your kid is into that sort of thing. Getting a parking spot here is half the battle, but pretty easy before 10AM, so try to get there early if you can.
The park is a popular spot for rock climbers, which our kids love watching. The loop trail will take you around the park to a beautiful viewpoint (which you see in the feature image at the top of the page), although it can be a bit higher on the difficulty scale if your family is used to more flat ground. This might be a good trail to break out the backpack if you’ve got one, but it’s well worth the view looking at Howe Sound if you can muster the patience.
It’s not as extreme as it looks, we promise!
Alice Lake
This is an easy walk around the lake from the main parking lot (which can get incredibly busy in the summer). There are bigger loops one can do with some elevation such as the Four Lakes Trail, but for little legs it’s a nice walk around to the far side of the lake where there is some greenery to explore inmthe far side.
Parents and bigger kids who mountain bike will want to spend some time on the trails around Alice Lake — they are exceptionally good! And for the toddlers there’s a pump track that is well worth a visit, right next to the awesome forest playground.
Worth a visit if you’re from out of town, and worth an annual pass if you live around here! The gondola takes people up 800m above sea level to an area with well-cleared trails both short and long. The Alpine Alley trail is made specifically for little ones, with cutout animals along the way and information about local ecology. It’s an excellent way to spend a day, or even just a few hours in the afternoon or evening.
Whistler has it all, from leisurely walks on the Valley Trail to Strenuous overnight backpacking missions in the alpine. Somewhere in-between is a good family-friendly hike that will suit any ability (or energy) level. And the best part is, most everywhere is Dog Friendly. Remember that Whistler is bear country; so it’s important to follow bear aware principles wherever you are.
Lost Lake Park
This is a must for any family visiting Whistler. It’s got everything you want in a good summers day…all packed up into one session. Beach time, easy hikes, and a trail network offering a good progression from beginning to intermediate trails make Lost Lake Park the best all-around spot in Whistler for summer fun. Parking is prohibited in the summer because it’s so busy, but there are shuttles from the village and day lots. Alternatively, it’s a 2km walk from the village, which is stroller and wagon friendly.
Lost Lake Park
Emerald Forest
This is a good hike with toddlers in the fall when the rains come and the mushrooms pop out. Summer is fine, but there isn’t much good water nearby to cool off, unless they are on bikes. There’s a pond but the water isn’t exactly free-flowing. However as a forest, the trails are easy and safe, and you can meander back and forth to kill a few hours easily. There are intermediate trails too if there are older siblings or cousins looking to be entertained.
Train Wreck
This old wreck from way back in the mid-20th century is probably one of the most unique hikes in the Sea-to-Sky corridor. It has become a bit of a graffiti museum and decommissioned bike park. It’s only relatively recently that it was on the radar for everyday visitors, thanks to an upgrade to the trails and a bridge over the river. The result is a very photogenic collection of rusted metal amongst some second-growth forest that hardly even knew the train wreck happened. The bridge over the river is a hit, too.
This one is a bit more than a jaunt, but it’s also stroller or wagon-friendly once the kid’s legs get tired (and they will). But this out-and-back walk takes hikers through some of the most majestic old-growth forest that is easily accessible. It’s an 8km drive up a dirt road from the highway at Function Junction, and then another 3km walk in on a well-cleared trail to the lake.
The old-growth forest starts about 1km in. So it’s not for the faint of heart if you have little ones, but well worth it. That’s where the image in this header is from, and we could go on and on about how magical it is there! You can read more about it here.
Toddler-Friendly Trails in Pemberton
One Mile Lake
Right before you enter town from the south side you’ll see One Mile Lake on the right. This lake has a swimming and picnic area for when it’s hot out, or you can walk the boardwalk and trail around the lake for a good kid-friendly loop. This is a popular spot for birders in the morning, so if you have a loud toddler you might not make any friends… however they are usually gone before most kids are up and going.
Nairn Falls
This is a 2km out-and-back hike that isn’t completely flat, so you’ll want to leave the stroller. The scary parts are fenced in, but it’s nature — if it’s raining or your kid likes to move, just keep them in close range. The falls are stunning and the forest is lovely.
Beyond Pemberton
Joffre Lakes Park
This is the iconic spot that blew up on social media about a decade ago. Nowadays you need a reservation to get there, but it’s well worth it. Whether you just hang out at the first lake or are ambitious enough to get to the third, it’s well worth the drive. The drive itself is worth the effort to get out of cell phone range and into a mountain pass of iconic beauty. The one-hour journey from Pemberton to Joffre Lakes takes you up and into a pass that offers jaw-dropping vistas at every bend in the road, rising over 1000m in a matter of 15 minutes. You will get that iconic shot of the turquoise lake with rocky alpine backdrop within 30 seconds of the parking lot… or you can do the hour-and-a-half hike to get right up close and personal with the landscape at lake three.
The only time we’ve been there as a family was in the winter… time to go back!
Map of the Best Toddler-Friendly Hikes in the Sea to Sky
The Journey Begins
These zones are really just scratching the surface of where you can hike with a toddler in the Sea to Sky. But it sure is a good start. Checking all of these off your list will give weeks of enjoyment. By then, your family might be ready for a bit more challenge.
See you out on the trails!
Want to Find More Hiking Spots? Check Out Our Free App
We made an app to help families navigate the Sea to Sky corridor a bit better. Check out the Sea to Sky Family Navigator app to plan your trip and find spots based on map, activity, location, and more! The best part, it’s free!
Waikiki Beach in Honolulu, Hawaii is famous for a reason. The accessibility to a relatively safe beach with consistent waves has attracted people from all over the world for centuries. It was once the home of Hawaiian royalty and countless other local Hawaiians who cared for the island long before western colonization.
The Twin Fin Hotel: At a Glance
Best For: Active Families who want a safe lagoon next to the Zoo
The Vibe: Surf-chic with old-timey beach boys energy. Very welcoming to families and groups.
The Location: 2 minutes to the sand, 5 minutes to the Honolulu Zoo
Sustainability: Plastic-free (aluminum water bottles provided) and ocean-first initiatives.
Although the controversy of westerners coming in and taking over will continue, the reality is that Waikiki has changed into an international tourist hotspot. There aren’t many places in the world quite like it, and visitors appreciate the convenience of nice restaurants and hotels being so close to a world-class beach.
But not all hotels here are the best to bring kids along. Some are a bit too fru-fru, and others border a seedier side of town that doesn’t get discussed in the tourist brochures. For families who want to be steps from the beach but don’t need something lavishly extravagant, we found a great hotel that is welcoming, clean, and has one of the absolute best locations in Waikiki.
The Twin Fin is a relatively new name in Waikiki, but the building has a long history. Before it was sold and remodeled, most knew it as the Aston Waikiki Beach Hotel. The property sold in 2018 and underwent a full-scale renovation to bring it into contemporary times. With that remodel came a whole new rebrand, giving the property a surfing energy that is palpable throughout.
The Twin Fin is the last hotel on the right.
Room Options for Families
The hotel offers several room configurations depending on your budget and family size. From a standard City View Room that offers great value, to an Ocean View Suite where you can sit out on the Lanai with room for four guests. If you are traveling with a massive group, they even offer a Luxury Suite with space for up to 10 guests, making it the ultimate basecamp for a big Waikiki Beach family vacation.
If there’s availability you can request an upgrade for a little bit extra (I think it cost us $50 for three days) and it’s well worth it to have this view out your door:
This is your sign to get the upgrade to an ocean view room if you have the chance!
The Coconut Club: Breakfast with a View
One huge advantage of the Twin Fin compared to other hotels in the area is the Coconut Club—an open social area with a stunning 21st-floor view of the ocean that offers breakfast in the morning and entertainment at night.
During our stay, we enjoyed a full menu of breakfast delights, from usual staples like bacon and eggs to local fare such as loco moco and acai bowls. It’s the perfect way to start the day while watching surfers catch waves, whale-watching boats cruising out to sea, and massive cruise ships entering and exiting the harbor.
We got pretty used to having breakfast with this view.
At night, we caught a launch party for Parley, an environmental organization dedicated to cleaning up our oceans. It included a panel discussion from some of the world’s top Big Wave surfers, including the winner of the 2022 Eddie Aikau Invitational, local North Shore lifeguard Luke Shepardson.
Legendary big wave surfers sharing stories during an event launching Parley’s partnership with the Twin Fin.
Twin Fin’s Sustainability Initiatives
Beyond simple marketing, the hotel has made great strides toward doing things better. In a place like Waikiki where excess is the norm, it was a welcome treat to see a hotel going far beyond just telling people to reuse their towels.
Twin Fin Waikiki has teamed up with Parley in an exciting multi-year partnership to protect Hawaii’s beautiful beaches. Visitors are encouraged to stop by the pop-up AIR Station at the hotel, where they can learn and get hands-on with local conservation efforts, including an interactive spot where guests can borrow sand sifters to help clean up a local beach.
There are also no plastic water bottles on site. Thanks to an exclusive partnership with Mananalu (the sustainable water brand started by Hawaii-born actor and ocean advocate Jason Momoa), guests find complimentary 16-ounce reusable aluminum water bottles in their rooms with fill stations located throughout the property.
Local Tip: The resort’s amenity fee includes rental credits for Waikiki Beach Candy, so guests can easily grab paddleboards, surfboards, or beach chairs. However, if you want to skip the rental lines entirely, check out our guide on How to Pack a Complete Family Beach Setup in Your Checked Luggage!
Location: The Honolulu Zoo is Right Next Door
The Twin Fin is located right next to the Honolulu Zoo. Being so close means you can come and go without much fuss, and you can time the visit for when it’s not so busy. Although there is much to criticize about what zoos are about, there is still plenty of value in humans having some degree of contact and understanding with wild animals, and kids absolutely love it.
The Banyan tree at the Honolulu Zoo is an attraction unto itself.
Frequently Asked Questions
Is the Twin Fin Waikiki good for kids?
Yes! It is located on the quieter, family-friendly end of Waikiki Beach. It is steps away from the Honolulu Zoo, Kapiolani Park, and the protected swimming lagoons of Waikiki, which are perfect for toddlers and young children to splash safely away from large shore breaks.
Does the Twin Fin hotel have a pool?
Yes, the Twin Fin features an elevated outdoor pool deck with cabanas, lounge chairs, and regular live music. It overlooks the ocean, making it a great spot to relax if you need a break from the sand.
How far is the beach from the Twin Fin?
You simply cross Kalakaua Avenue and you are standing on Waikiki Beach. It takes less than two minutes from the hotel lobby to the sand.
Getting surf lessons right across the street from the hotel, thanks to JOB surf school
To Sum It Up…
We really enjoyed our stay at the Twin Fin with our little girl, largely thanks to its proximity to the beach and the Honolulu Zoo. The fact that the hotel is making proactive moves to do better by the environment resonated well with us.
Being so close to great restaurants and easy, surfable waves that everyone can enjoy was a huge treat. Our baby is just a bit too small to be surfing yet, but I’m sure Waikiki will be one of the first places she stands up on a board. In the meantime, the safe beach lagoons were a perfect place to play.
Waikiki isn’t for everyone, but with small children, the Twin Fin makes for an easy, hassle-free vacation at one of the best beaches in Hawaii. We will definitely be back!
We use affiliate links to pay the bills. We were not paid for this review, however the folks at the Twin Fin did kindly offer us a free stay. But this is all our opinion; we will never just fluff a place because we got a free stay… we really did like it!
We care about the recommendations we make. We sometimes (not all the time) use affiliate links to help keep the site running. Learn more about our Gear Review Policy here.
Packing for the beach is a chore. Add kids to the mix and it becomes so daunting that it might even be overwhelming enough to not want to go. We’ve definitely been there, and we live a five minute walk from the beach. It’s more than half the battle to even get out the door when you have to think of all the snacks, diapers, toys, sunscreen, towels, etc. that make a beach day run smooth.
Enter the Beach Tote. What was once a simple bag has now evolved to a handy, durable mobile command station for essentials on the go. What makes a beach tote better than other bags is the speed at which you can toss gear into it and be on your way—and vice versa when you get there.
As a family of four, with one still in diapers, it’s amazing how much we need to pack for a successful day at the beach. But we’re getting the hang of it, living a five-minute walk from the beach at home and doing a few trips to warmer climates each year, complete with our beach kit in a duffel bag. But the tote still reigns supreme for day missions. Read on to see what has passed the test over the years of testing these professionally for different outlets, and now bringing you our favourites on our home site.
Bottom Line: This thing is a beast, and is meant for those who know how to pack well. the multitude of accessory loops provide virtually unlimited customization. The bag also comes with a lifetime warranty.
Kitworks is a new brand that launched early 2025. Founder Greg Mills designed the Gear Tote (among other bags) based on his own experience dealing with outdoor gear and never having something that matched his obsession over organization. As someone who lacks a similar affinity, I’ve gotta say that I really appreciate how much detail and care went into the system. This is not for people who just toss their gear in and throw it out, or at least strive to be more. The multitude of slats—both inside and outside—combined with additional accessory compartments make this tote a dream for making life easier. It’s also the only tote that had a separate, removable wet gear storage ($15 extra) that you can stash neatly out of the way that hooks on with ease.
For those with MOLLE enabled accessories, you’re in luck. The loops on the inside and outside will give you even more opportunity to customize this bag to your heart’s content, giving this bag far too many uses beyond a beach tote to list here in our review of beach totes.
The bag is marketed more for a single sport such as climbing, skiing, or mountain biking, and all the accessories that come with it. And there’s no question—this tote can do the trick in any of those situations as well. But for family beach adventures, it’s a solid (both literally and to use the parlance of our times) unit that will withstand years of abuse. I try to stay out of tech talk but the bag features 900D ripstop TPU on the exterior, which is the highest-numbered denier rating I’ve seen out there for a bag like this. It’s rugged, and can take a beating, and do it all again the next day.
On top of all that, Kitworks uses (mostly) recycled materials and donates 1% of profits to causes promoting responsible recreation. If you enjoy rooting for the smaller companies, this one is now on your radar.
Pockets: Internal water-resistant zip pockets, fold-out side pockets for water bottles
Attachments: 16 External Gear Loops, large
Closure: G-Clip
Self-Standing: Yes
Bottom Line: This was our favourite tote for when you’re in a hurry and need to just toss everything in and GTFO of town. It’s solid and rigid, and is just big enough to toss a day’s worth of supplies without getting too large and cumbersome.
The inside pockets of the Yeti Camino
When most people think of Yeti, durability comes to mind. And we can get that part out of the way really quick: This bag has been tested at 300lbs. We didn’t test that as it’s pretty hard to find anything that small that weighs 300lbs (unlike Yeti who probably had a few spare gold bricks laying around by now). So I guess we will have to take their word for it. The construction certainly is solid, though.
But the construction isn’t what stood out the most. The main thing is just how easy the grab-and-go portability really is. Of all the totes we tested, it holds its shape the best. This is good if you have a lot of storage space, but it doesn’t exactly store well. But the idea is that you’ll be using this enough to not be stashing away in the basement any time soon.
The bag itself is waterproof and can take a pretty good beating. Inside the bag, there are two zippered pockets on either end, and two collapsible compartments on either end for stashing a water/wine bottles or anything that you want to keep easy tabs on. Outside the bag are enough gear loops to attach plenty of extra items, should you need it.
Closure: Roll top and buckle (dry bag), G-clip (tote)
Self-Standing: Yes
Bottom Line: This essentially a dry bag moonlighting as a tote. If dryness is preferable above having customization or compartments, this might be the top pick.
We live in coastal British Columbia, meaning it rains. And by rains, I mean it rains a lot. So if you are only a fairweather adventure family around here, you won’t be doing much half the year. RUX is a brand just up the highway from us, in not-so-sunny Squamish, BC. And what would you know? They made a tote bag that is pretty much a fancy dry bag, but with the convenience of a rugged tote.
Their waterproof bag is advertised at 30L, but when you extend the roll-top dry enclosure, it can fit much more than that. We were able to put everything but our waterproof gear inside it, and have it still be effectively waterproof.
Although great for keeping water out, the bag does fall short in some of the other areas where the extra organization comes in handy—especially when you’re talking about diapers and other baby-related accessories. The bag does have two internal pockets, but they don’t have any enclosures.
Handles: Small and large handles in center, side handles for easy grabbing/moving
Pockets: Several mesh pockets on inside, weather resistent zipper pocket on outside
Attachments: External gear loops
Closure: Two buckles
Self-Standing: No
Bottom Line: This tote is just as good as anything else we tested, and a fraction of the price. There wasn’t anything that stood out as above the rest, but is rugged, durable, and well-designed.
Cotopaxi is a brand that we enjoy giving good press to, simply because they are a company that values a whole lot more than profit. For that reason, it’s worth directing your hard-earned money to a company that is doing a lot to care. But feel-good PR aside, it’s a great bag. It’s spacious enough to throw a day’s worth of gear in it, with room to spare—with more than your average organization that comes standard. The inside is all lined with pockets that were perfect for stashing diapers and the kids’ spare clothes.
On the outside, you have an array of gear loops that make for easy tying-on or down, allowing for much more than the 60L inside. We’ve been using this tote for 2 years and while there’s some signs of being used, none of the wear is damaging to the integrity of the bag. We loved it on our trip to The Twin Fin in Waikiki for the ease of tossing things in and out quickly, but with a multitude of pockets to organize the essentials, cash, phone, etc along with everything else.
It’s a great all-arounder that, despite not being self-standing, allows for easy packing and unpacking thanks to the wide opening.
For a totally minimalistic approach where you just want a few items, this new tote/towel from Rumpl is a fantastic option. It also might be a pure fantasy to be in a review page for families, but hey, there are hopefully times where mom or dad can duck away for their own time, and if so, a minimalistic approach might be well received. The towel itself is quick-drying and antimicrobial. It’s great to be able to flip it inside out and toss in a few extras, as well as a zipper pocket for phone/keys/wallet. Sometimes, a towel is all you need!
It’s not everything, but most things we bring on a beach day…
Beach totes have become a big part of our beachgoing experience lately. There’s something far less stressful about them when trying to get out the door with two little minions who, regardless of mood, still need us to dress them, put sunscreen on, get them in and out of the car, all while packing for mom and dad…
We’re starting to get more dialed with it, and when I’m feeling super on it I’ll have it pre-packed for when we are able to go on a moment’s notice after a change in weather or circumstance. We live in Vancouver where there are a plethora of kid-friendly beaches close to us. But even still, getting out the door with all the necessary accessories can seem daunting on a good day.
Once life could be lived with spontaneity it opened up a world of possibilities as a family. This was especially true on summer days after work, when the thought of getting ready to go to the beach felt daunting. Now, the impulse has far greater strength when we know that the bag’s already packed. And thanks to using a beach tote, it’s super easy to throw things in last minute as you’re walking out the door.
So we’ve been using these totes for the past two summers, learning more about packing smart and being able to have a beach kit handy to go. Starting with a wider range of bags we narrowed it down to the four you see here, and really got to know them better.
That way, we can really test these four bags in more depth and find out what really makes each one stand out, or not measure up. It also helped us really appreciate the idea of grab-and-go portability, which is where beach totes and their ilk seem to rise above other bags for this particular purpose.
The self-standing option of the YETI camino comes in handy with an open bag of snacks!
Testing Criteria for Determining The Best Beach Totes
To make things more fair and uniform, I did a separate test beyond everyday use so that there was a bit of consistency in what I was testing. It could have been a bit more comprehensive in retrospect. You’ve got to give me a bit of a break as I needed to get this done in the short period between after work and dinnertime, while still having time to enjoy the kids. It might have been hasty but it’s thorough and objective, something that all online gear reviewers unfortunately can’t say. You know who you are…
But that’ s another story altogether. For now, here’s what we included in the test:
Blanket: Nomadix Puffy Blanket
Dad’s Jacket: Patagonia Waxed Cotton
Mom’s Warm Shirt:
Diapers
Wipes
Two Snack containers (Snapware)
Sunscreen
Headlamp, just in case
Car keys
Two Chairs: Crazy Creek Hex 2.0 Longback and Aircliner
Two Rockie Talkie 2 Watt radios
2 Towels
Spare clothes for the kids
This list is obviously not exhausting, as mentioned above. We’re missing a water bottle, some of those applesauce pouches, a stuffed animal or two, and the all-important beach toys. None of the bags were stuffed full though, so one can assume that
Hosing down the bag for a few minutes to simulate rain… everything stayed dry!
How to Choose The Ideal Beach Bag
Everyone’s family operates a bit differently, so you probably know what type of beach tote suits you better than anyone else. Maybe it’s even a basic reusable grocery bag, and that’s totally fine. This guide is to help people get something a little more premium and long-lasting, as well as with a bit more organization to help make beach missions with children just a little bit easier.
So have a look at this guide to hopefully help you have a bit more in your day enjoying the beach, and less time preparing for it.
Durability
This is a major factor for choosing a beach tote. After all, if the bag won’t hold up under abuse, you might as well not invest your hard-earned dollars in it. Many bags are made from some type of oil-based material like Polyester or nylon, with a TPU (Thermoplastic Polyurethane) coating for waterproofing and extra rigidity.
If you see a product boast about a number with a D following, that relates to the Denier rating. Basically, the higher the D-rating, the thicker the fiber used in weaving it. This is not the same as a thread count, which measures how tight a weave is. Generally speaking, given everything else equal, the material with a higher number will be more durable.
Gear Loops
All the beach bags we reviewed have a space to attach extra gear through loops. There are two different kinds in this review. One is with sewn-on loops (Cotopaxi and Yeti) and the other is the MOLLE style loops that are cut out of the material (RUX and Kitworks).
Sewn-on loops generally have more space to work with, and are easier for tying a rope/cord around, or to clip a carabiner onto in a hurry. The cutout loops are more of a lower profile, so have a lesser chance of getting caught onto something. It’s also a bit tougher to thread a piece of rope or cord onto. Not that it can’t be done, but it will just take some extra time.
Pockets
Yes, a beach tote can be considered one giant pocket. But aside from that, it helps to have a few extra smaller pockets on hand to avoid digging through a black hole when you really need something.
Some pockets have an enclosure such as velcro or a zipper. This is more important if you’re trying to stash valuables such as a wallet, keys, or a phone—basically anything that would ruin your day if it went missing at the beach.
If you’re the type that doesn’t throw their gear around too much and leaves the tote upright (and your kids do too), then having pockets that close isn’t as big of a deal. But make sure you know what and how much stuff you want to give extra protection, as it could affect what bag you end up buying.
Clean-ability
Families on the go are guaranteed to make a mess. It’s pretty much inevitable. But how quickly can that mess disappear? We rated the different totes on hose-ability, and how quick a wipe with a rag can do the trick.
The RUX Waterproof tote was the easiest. The TPU-coated nylon wipes clean in seconds.
The Yeti Camino took a bit more effort due to the weave pattern in the material. Stubborn stains would take a bit more scrubbing. The inside was all good, though. The Kitworks tote cleaned well but the handles weren’t so easy for cleaning stains. Same with the Cotopaxi bag, with the added hassle of the inner lining not being the easiest to clean.
We hope this review helped make your decision a bit easier. If you love beach getaways and want to pack the whole kit and caboodle, check out our recommendation for the ultimate beach duffel setup for your checked baggage. We have many more Gear Reviews for you to check out, hope it helps somehow! See you out there!
With all the beautiful chaos of life at home and on the road, comfortable feet may be the most consistent gift you can give yourself (or a loved one) for starting or ending a great day. Wherever life takes you, a good pair of slippers can be an ideal bridge between bedtime and whatever adventures await.
Over the past few years we’ve been offered sliippers to test, and have sought our our own, along the way. We have come to learn that the best slipper is definitely one you have on compared to cold or overheated feet.
We’ve tested the good, the bad, and the dreamy in damp campsites, alpine huts, Hotels of varying cleanliness, Hawaiian Lanais, and at our home in British Columbia to give this list to anyone who needs the best slipper for wherever on earth you may be. Here are our top slippers for both kids and adults, broken down by where they shine the brightest.
We care about the recommendations we make. We sometimes (not all the time) use affiliate links to help keep the site running. Every item here has been hand-tested through years of professional outdoor work and surviving weekend trips with my own toddlers. Learn more about our Gear Review Policy here.
Style: Boot or Low cut Weight: Upper Material: Wool Sole: Rubber (Leather option found below)
Pros: Next level comfort, warmth, breathability Cons: Minimal arch support
Glerups are legendary for a reason. The Danish staples of comfort only get better the more you wear them, as long as you don’t blaspheme by wearing socks.
By opting for the boot-cut version with the natural rubber sole, you get a travel shoe that can confidently step out onto a wet hotel balcony without ruining the base. Since it’s made from 100% natural, itch-free wool, they breathe beautifully and naturally fight odors.
They are designed to be worn without socks, molding perfectly to the shape of your foot over time for a custom fit.
Style: Slip-on Weight: 17 oz Upper Material: Polyester Sole: Rubber
Pros: Great around the campsite, soft midsole Cons: Foam and polyester aren’t as breathable as natural materials
These are the ultimate campsite companions. We are keeping these right by the tent door for our upcoming stay at Porteau Cove because they seamlessly bridge the gap between a cozy slipper and a durable outdoor shoe. The footbed features a massive 30mm ULTRA-COMF foam insole that feels like walking on a marshmallow. It’s warm, and that might be its biggest drawback in warmer climates. But for cold-weather camping, it gives you something other than boots to wear but won’t be shy on the trail if there’s a bit of walking to get to an outhouse or water source.
The quilted ripstop upper is treated with TevaRAPID RESIST, making water bead right off, while the tough rubber outsole easily handles gravel, dirt, and damp grass. Although we are featuring the low-cut version, we actually tried the boot version, but it seems to be discontinued. That was probably because the higher cut can be a bit tedious for getting on and off, so the lower-cut version addresses our most critical feedback. Other than that, its’ an excellent go-to for camping out. It’s available in both men’s and women’s styles.
Pros: Exceptionally warm for a low-cut, lightweight slipper Cons: Being discontinued 🙁
Word on the trail is that Danner might be phasing these out, so if you see them on sale, grab them immediately. They are a powerhouse of warmth with a sleek, low-profile design. Packed with 200G PrimaLoft® Gold insulation, they trap heat perfectly even on freezing mornings.
The collapsible heel is an absolute lifesaver when you need to slide them on hands-free while holding an armful of firewood. Plus, the retro waffle outsole utilizes a FrostTrekker compound for serious grip on icy ground.
DEAL ALERT! Although this model is being discontinued, it’s being offered at a huge discount on the Danner store.
Style: Boot or Low cut Weight: 1.5 lb/pair Upper Material: Ripstop Polyester Sole: Rubber with Gel insole
Pros: Drawcord closure keeps heat in Cons: Not good for walking too far
Having packable booties is a must for winter escapes in faraway cabins, or even car/RV camping where space is limited. These booties are a staple for backcountry skiing, but family trips are just as essential for saving space in the pack.
The weather-resistant exterior easily sheds light snow and accidental coffee spills while keeping your feet toasty. While it’s not exactly what we’d call durable, it is great for quick romps outside or when getting out of tight boots and taking a load off at the end of the day. They definitely are a cold-weather type bootie, so they will probably sit in storage for summer. But even cool nights at the beach will be nice with these, especially since they repel sand quite easily.
Travel slippers blend the need for packability with not looking like a total hobo in a hotel lobby (but being oh-so-comfortable). We chose these options on both comfort and practicality.
Best For: Airport security and long-haul flights ✈️
Style: Mule Weight: 18 oz Upper Material: Leather Sole: EVA/Rubber
Pros: Soft comfort, Durable sole for outdoor use Cons: Doesn’t pack up well
Olukai offers some of the best premium comfort for any shoe. Their marketing tells us it’s like “walking on wet sand”, and after about two years in one of the slippers, I can confirm that it does feel like it molds to your foot in the same manner. It’s more than just hype, it’s a fantastic fit that only gets better with time.
The Ku’i speaks to the ladies, and while it may not be small and packable to be ideal for travelling, it’s worth a bit of extra bulk and weight to keep moms happy! The rubber sole lets you get away with walking around outside, something mom loved while visiting the Nita Lake Lodge in Whistler. And if you’re on a plane for more than three hours, it’s nice to have a pair of slippers that you can still walk quite a bit in… at least to get to the baggage claim to put on some “real” shoes.
The toughest choice on these are whether to have them inside or outside.
Airports aside, these are also great at home, and with the durable outsole you can go for neighbourhood walks without wrecking them.
OluKai also makes great options for men. We are fans of the Moloa leather slippers, which are actually excellent for packability in contrast. The shearling/leather combo is oh-so comfortable, and with the collapsable heel, you can fit them into your back packet if you really wanted to. But the shape-melding sole that gets better with time is a feeling that has us hooked.
Sometimes we need every cubic inch of luggage space possible, especially if carting around babies or toddlers who take up the bulk of luggage (their stuff, not them!). Here are some of the best slippers that pack up easily.
Pros: Soft comfort, Durable sole for outdoor use Cons: Faux Fur gets a bit hot, no arch support
These slippers are marketed as “house shoes” – and they definitely go well around the house. But where they outshine others in this list is how well they can pack up, thanks to the flexible suede sole. While it doesn’t offer a ton of support, the hopes are you’ll be having your feet up relaxing for most of the time you’re wearing these, not bearing weight.
The suede sole feels nice and light underfoot but beware if you wear them around messy toddlers as whatever they drop on the floor will end up ingrained into the sole. That’s a big reason why we prefer these on the road more than at home… but if you don’t have little ones spilling everything all the time, these are like durable socks that only get more comfortable the more you wear them.
Style: Mule Weight: 475 g Upper Material: Wool Sole: Leather
Pros: Super soft yet durable, shape conforms to your foot. Cons: Slippery on wet hardwood
While the rubber-soled Glerups are great for travel, the low-cut slipper with the leather sole is the ultimate indoor-only slipper. The natural wool keeps your feet incredibly warm without ever letting them overheat or sweat.
They are absolutely perfect for keeping your feet warm on cold concrete floors while tinkering in a basement workshop or making coffee on a frosty morning.
As great as these are, they aren’t ideal if you have little ones that spill things. They stain easily and get super slippery when in contact with water. This is from painful experience… as great and comfortable as they are, they are best for carpets if toddlers are wreaking havoc around the place.
Pros: Easy to slip on, fits many sizes, fun colours Cons: Not great outdoors, poor traction
Patagonia has a massive line of kid’s gear, and these little booties are an affordable option for warmth at night when the socks are dirty, the boots are off, but the kids aren’t ready to go to bed.
There’s not much to the Synchilla Booties, but kid’s don’t really need bells and whistles, just something to keep their feet warm and toasty, with a little bit of protection. They pack up super small, and are just a hair larger than socks, but have a durable enough sole to protect their feet from rocks and dirt.
We love the fact that Patagonia offers a lifetime repair guarantee, although chances are they will grow out of them first. But they will hold up through many generations of hand-me-downs, and are an easy-to-pack staple of a camping kit for kids.
Pros: Good closure, high cuff Cons: Bottom can wear out
If you are a Canadian family, you likely already know and love Mountain Equipment Company (MEC). Their “Toaster” line is legendary for keeping little ones warm during brutal winters, and these booties are no exception.
The biggest selling point here is the design: they feature a higher cuff with an adjustable hook-and-loop closure at the ankle. This means they actually stay on kicking toddler feet, a major win for parents. They are highly insulated and weather-resistant, making them the absolute perfect piece of gear to slide onto your kids’ feet before packing them into a sled or a hiking carrier for a frosty morning walk.
They do wear out though, so unless you’re a fan of duct tape, you’ll need to do some reinforcing if you plan on doing some hand-me-downs.
How We Tested The Best Slippers For Travelling and Camping
We are an adventurous family, as you might have guessed by the name of this site. But even more than just adventurous, we actually care about the planet and the companies that do better to improve the communities they serve. So a big part of our test is to only recommend companies with a bit of integrity to them.
Everyone here is at least making some efforts toward being more sustainable than others, even if not perfect, quite yet.
We are based in British Columbia, where the winters are cold enough to warrant some extra warmth on the feet. We also live in an old house that was built in the 1940’s, and the wood flooring can be cold without some warmth underneath. So although we tested these outside as well, the majority of the testing was done at home in our old house, the cold floor to tell us if it’s good or not.
But we enjoy camping, and being cozy on flights too, so we would always have a pair of slippers along from the ride, whether going to Whistler or camping in our Kodiak tent at on Vancouver Island.
A pretty good testing ground for beach slippers, if you ask me!
Buyer’s Guide: Choosing the Perfect Slipper
With so many premium options on the market, narrowing down the right pair comes down to where you plan to use them the most. Here is what we look for when testing slippers for our adventures:
Packability and Weight
If a slipper takes up as much room as a hiking boot, it is going to get left behind. Options with flexible uppers and collapsible heels rise to the top of the list. Materials like PrimaLoft insulation, down, and natural wool are incredibly warm but can be squished completely flat in the corner of a duffel bag.
The Outsole: Rubber vs. Soft Leather
This is the biggest deciding factor. If you plan to wear these outside of a tent or across a wet campsite, you absolutely need a rubber outsole. However, if you are strictly looking for indoor comfort or adopting a shoe-free sanctuary at home, a soft leather or suede sole will be much quieter and gentler on hard floors. That said, rubber will grip better on certain surfaces, especially if you’re like us and have toddlers spilling all sorts of things in strange places.
Material: Natural Vs. Synthetic
The big decision when choosing which slipper has a lot to do with material. Generally speaking, wool is often the winner for the comfort department. But not everyone likes the feeling of wool, and prefers synthetic materials. Synthetic can be warm but doesn’t always breathe as much. Ultimately it depends on your foot, any allergies you may have, and personal preference. But in our opinion, nothing beats good wool, as long as it comes from a responsible source.
The “Slip-On” Factor
When you are holding a sleeping toddler or an armful of firewood, you do not want to be bending down to wrestle with your footwear. A good camp or travel slipper should slide on completely hands-free. We highly favor designs with a drop-in heel.
Slipper FAQ
A few questions we get asked the most about choosing, packing, and living in a good pair of slippers.
Can you wear slippers through airport security?
You can, and a slip-on pair makes the whole shuffle through standard screening faster since you’re not lacing anything up. The catch is the floor — airport tile is filthy, so we lean toward a pair with a real rubber outsole like the OluKai Ku’i or Glerups rubber sole that you won’t mind walking on, rather than a soft suede sole you’d rather keep clean. Bonus: they’re already on your feet when you board, so there’s nothing to dig out of the overhead bin.
Should you wear wool slippers with or without socks?
Without — at least for Glerups, which are designed to be worn barefoot so the wool can mold to your foot over time for a custom fit. Wool also naturally fights odour and breathes, so sweaty feet are rarely an issue. If you’re someone who can’t go sockless, a synthetic or fleece-lined pair will feel more familiar.
Are wool or synthetic slippers better?
It comes down to your feet and what you’re doing. Wool is our pick for all-around comfort: it’s warm without overheating, breathes well, and resists odour as long as it’s responsibly sourced. Synthetics like PrimaLoft are seriously warm, shed water and packable bulk better, and suit anyone who finds wool itchy, but they don’t breathe as well, so they can run hot. For camping and cold mornings we reach for synthetic; for everyday wear we reach for wool.
Rubber sole or leather sole — which should I get?
This is the single biggest decision. If you’ll ever step outside. A wet campsite, a hotel balcony, a quick trip to the car and you want a rubber outsole for grip and weather resistance. If it’s strictly an indoor, shoes-off-at-the-door slipper, a soft leather or suede sole is quieter and gentler on hardwood. One warning from experience: leather soles get genuinely slippery on wet floors, so they’re not ideal if toddlers are spilling things around the house.
How do you pack slippers without taking up luggage space?
The key is to get a flexible upper and a collapsible heel. Those two features let a slipper squish flat into a corner of your bag. Insulation matters less than you’d think for packing: PrimaLoft, down, and wool all compress well. Our most packable picks are the Kolo House Shoes, the OluKai Moloa (the collapsible heel folds it down small), and the Outdoor Research Tundra Trax booties for cold-weather trips.
How do you keep slippers on a toddler’s feet?
You need a high cuff and a closure. Plain slip-on booties get kicked off in seconds, but a bootie with a tall ankle and a hook-and-loop strap like the MEC Toaster actually stays put on a wriggling kid, which is what you want before loading them into a sled or carrier.
How do you clean wool slippers?
Very carefully. Spot-clean with a damp cloth for everyday marks, and for a deeper clean, hand wash in cool water with a wool-safe detergent and let them air dry away from direct heat. Skip the washing machine and never put wool in the dryer. Heat and agitation cause it to felt and shrink. Treat them well and a good wool pair lasts years.
Are slippers really worth packing for a trip?
For us, that’s an enthusiastic yes. They take up almost no room with the right pair, and after enough red-eye flights, cold hotel floors, and frosty campsite mornings, we’ve found that warm, comfortable feet genuinely cut down on travel fatigue for the whole family. It’s a small luxury that punches above its weight.
Final Thoughts: Don’t Skip the Slippers
When packing for a family trip, it is easy to view slippers as an unnecessary luxury that takes up precious cargo space. But after navigating countless red-eye flights, cold hotel floors, and frosty mornings at the campsite, we can confidently say that investing in comfortable footwear reduces travel fatigue for the whole family.
Grab a pair that fits your travel style, toss them in your bag, and enjoy quality comfort no matter where you put your feet up to relax.
Which pair fits your family’s travel style best? Let us know in the comments below, and don’t forget to subscribe to our newsletter for more honest gear reviews and outdoor family travel hacks!
The secret to a good beach tote is in the details. Anyone can grab an oversized bag and stuff it with anything and everything they want to haul down for an afternoon on the sand. But there are a few excellent beach bags out there that go above and beyond to help families stay organized with piles of necessary stuff: snacks, diapers, extra clothes, towels, money… Not that you need me to go through a list that you already know.
There are a few bags we found to rise to the top, but one bag clearly stood out as one of the best all-around beach totes for its well-thought out design, water resistance, and the fact that it comes from a good company doing good things in the world.
It’s Cotopaxi‘s Allpa 60 Gear Hauler Tote, and it really is a remarkable piece of equipment. We’ve been using it for our family for nearly three years now and while we can’t speak to any improvements, the original is still going strong without anything falling apart. We’ve taken it all over and even included it in our checked luggage beach kit.
Read on to find out what we like about it, what’s not so good, and who might enjoy it the most.
Cotopaxi Allpa 60 Gear Hauler Beach Tote: First Impressions
Size: 60L
Handles: Small and large handles in center, side handles for easy grabbing/moving
Pockets: Several mesh pockets on inside, weather resistent zipper pocket on outside
On first sight, the bag didn’t look like much. It looked durable, sure, but was it worth the expense? Even without diving into the features, the durability was enough for second pause. The water resistant (but not submersible) exterior felt like it could withstand a beating. The handles are solid, giving you both the option to carry by hand or use the longer loops to throw over the shoulder. but it was inside that really made me take notice.
Lined all around the inside of the bag are mesh pockets that allow you to place smaller items out of the way. This has become invaluable for diapers, extra clothes, and snacks. The outside pocket is great for valuables, as it has a zipper and is part of the water-resistant exterior.
But when it really shined was when we finally started packing everything in there. It’s like it keeps on going. And just when you think you can’t pack in anything else… you can add extras onto the gear loops. Excessive? Perhaps. But if you truly want to master the art of the beach day, you’ll want to carry everything in one load from the car. And this bag will allow you to do that, and not explode when you do get to the beach.
Notable Features of the Cotopaxi Allpa Gear Hauler Beach Tote
We pretty much already went through this section but I’ll outline it in a bit further depth. The big standout feature in this beach tote is the water-resistant exterior. Nearly three years on and it’s still holding up strong. And if the tide comes in (I know this from experience), it’ll provide enough protection until you wisen up.
Another great feature that helps with packing is the internal buckles that hold the bag together when it’s packed full. The straps will cinch tight to keep items from splaying out too far, and in doing so, makes it easier to carry.
But the big feature wiht this bag is the many options you have to line the bag with smaller items that won’t get mixed up with the general population. This is great for when you need to reach for a snack or drink to quell a meltdown… and being able to know exactly where that item is in those critical seconds will be a lifesaver.
The inside pockets are a huge game changer compared to a standard beach tote.
Drawbacks
There isn’t really much that we can say about this bag that is a bad thing. I guess if I had to get pedantic, I’d say that while the exterior is great, it’s not fully waterproof… and you feel like it should be with how rigid it is. I haven’t seen it soak through, though… and for the most part it’ll repel enough water. Dry bags do exist, so this is probably a good intermediary before that, as long as you’re not out in the rain.
The bag also doesn’t stand up on its own, which makes packing easier but can be a pain if it topples over at the wrong moment. Most of the time it stands up well, but there have also been times where I forgot to buckle the inner straps and things started to splay out. It just takes a bit of learning and mindful packing to make sure it doesn’t topple over the moment you set it down.
Final Thoughts
The Allpa 60L Gear Hauler tote has fast become an essential part of beach days, pool days, and any time you need to toss a ton of gear into the bag really quickly. We’ve all been there… meltdown occurs or an emergency happens and we need to book it as fast as we can. This tote makes packing in a hurry super easy. The fact that you can open it wide and get everything out just as easy is excellent, and it cinchs tight to make it easy to carry. You can tell that this is a well thought-out bag from a great company that does a lot of good out in the world. You can’t say that about many companies these days.
We’re big fans and know that most families will appreciate something that lasts longer and makes their lives easier, and we have a hearty recommendation to try this one out!
Everything you see here could fit inside the tote.
Thanks for reading! We offer plenty of gear reviews to help mindful families choose gear that will last a long time and goes further than just making some shareholders wealthy. We follow a gear review policy to ensure we can stand behind our recommendations. We use affiliate links to help pay the bills, but never compromise our word for selling out. All of our reviews come from the heart.
We saved over $1000 by not renting beach gear in Hawaii last year. A bold claim, yes, but if you see how much we packed into a 100L duffel below, it’ll start to make sense.
One of the most surprising expenses on a beach vacation is renting beach gear. If you get the good stuff, you’ll be paying $50-100 per day. And if you cheap out, you will probably end up with gear that is a pain to lug around and set up.
By making an upfront investment and bringing your own gear, it’s possible to have a complete beach setup that will last many years, ensuring that no matter where you go, the family will have a comfortable time all day at the beach. And being able to maximize beach time is what we’re all about! So read on to find out more on the ultimate beach setup that can fit on one checked bag.
It really is amazing how much can fit inside a 100L duffel bag!
The Math: Why Checking a Bag is Cheaper Than Renting
Beach days require a bit of gear if you want to spend all day out there. You’ll want shade, blankets, towels, a beach tote, chairs, and a cooler as a minimum. Companies exist that rent beach gear, but even a basic package can be $60 per day, with more premium offerings like shade fetching up to $200 per day.
Instead, you can check a duffel bag full of your own beach gear, and have it be under the 50lb limit. If it goes over, the $100 oversize fee is still much cheaper than renting a daily rate.
Read on to see what we pack that made our two weeks in Hawaii a bit more affordable, thanks to our own gear that will last for many years to come.
It’s essentially indestructable and can be tossed around without worry of too much damage. The recycled, PFAS-free materials is weather resistant yet strong enough to take a beating. Plus, without any hard frame to content with, it’s really light. It also gets good bonus points for packing up into its own pocket when not in use to stay out of the way.
The bag also has two backpack style straps for relatively easy carrying. Alternatively, it’ll fit nicely on the luggage cart. It’s pretty amazing how much you can pack into the bag when you start getting into it.
This is our powerhouse when on the road. It does take up a bit of space, but it’s well worth it to have your own shade canopy to use on demand. Being inflatable, it has no frame so it packs up super well. It also helps it be more resistant to the wind. We love this thing, and it’s helped maximise our time on the beach when the sun is shining hot up above. Especially with little ones, it’s important to stay out of the sun midday. This makes it so we don’t have to pack up and leave, we can just have a nap in the shade. Doing so allows us to go to more remote places, away from crowds who are lugging big pop-up shade canopies or need to stay close to vegetation midday.
We made a ton of friends during the Eddie Aikau surf contest at Waimea Bay with our Soli air canopy!
There are a ton of options for packable chairs out there, but we are big fans of Helinox. The chairs are well made, pack up easily, and are relatively lightweight at around 2 lbs a piece. There isn’t much bad to say about these chairs… we’ve been using them for years and they hold up well. They do get a bit sun bleached, but think of that as a bit of a badge of honour to show that they are actually getting use.
The festival blanket is easy for sand management, while the puffer blanket can double as a bit of body warmth when it’s windy and you come out of the water. Both of them pack up nice and small, and weigh next to nothing. If you have to choose between the two, the puffy blanket is lighter while the festival blanket is more versatile.
Doubling as a waterproof dry bag that floats, the Icemule Jaunt keeps drinks and food surprisingly cold, while at the same time being able to pack away into the duffel with minimal space. It weighs only 1kg, which is pretty darn good for a cooler.
The Allpa is one of the top picks in our list of the Best Beach Totes for good reason. It fits a ton of stuff, offers multiple pockets on the lining, is weather resistant, and has gear loops on the outside for extra attachments. All in all, it’s a secret weapon at the beach, and allows you to organize your stuff. It’s also great if you just want to have a lighter kit without taking the entire duffel’s worth to the beach for days when it’s not an all day mission on the sand.
(Budget Alternative Tip: If you are slowly building your kit and don’t want to invest in the Cotopaxi just yet, a heavy-duty reusable IKEA blue bag packs completely flat and makes a surprisingly great, sand-proof beach hauler in a pinch!)
The Entertainment: Helinox PLAY Backcountry Games
Total Weight: 2 lbs
Traditional beach toys like massive plastic buckets take up too much volume. Instead, we pack Helinox PLAY Backcountry Games, which use the same ultralight shock-cord frames as their chairs. They keep the kids entertained for hours. HeliDrop is one of our favorites, where all ages can find a bit of challenge, even the littles.
Towels are essential, but a normal beach towel is large and heavy. Our family loves the sand-resistant, rolls-up-small, stylish-looking towels from Nomadix. It might not be as warm and cozy as a cotton towel, but the ability to compress small and fit in the duffel with everything else makes them a big hit. Plus, they are made from recycled waste, so you can feel good about helping remove stuff from the ecosystem rather than adding to it.
There was even room in the bag for some workout gear. Dad got to pack his TRX and Jump Rope to stay fit while everyone got to lounge on the beach. It’s a nice addition for those who don’t want to let vacation time ruin a good routine!
The Final Weigh In:
Patagonia Duffel: 3.5 lbs
Soli Canopy: 18 lbs
3 Helinox Chairs: 6 lbs
Nomadix Blankets: 3 lbs
Icemule Cooler: 2.2 lbs
Cotopaxi Tote: 1.5 lbs
Helinox Games: 2 lbs
Total Core Weight: 36.2 lbs! > This leaves almost 14 pounds for towels, sunscreen, and dad’s workout gear before hitting the 50lb airline limit.
Final Thoughts: Minimizing Overwhelm
There’s no doubt that it’s a bit of an investment in time and money to put together a beach getaway kit that you can put in your checked luggage. But once you’ve got it, you’ve got it, and you have a stress-free beach setup no matter where you fly.
Always check the limits of the airline you’re flying on in case there are different restrictions, however you can usually bet on a 50lb weight limit on major airlines. And if your beach vacation is actually a road trip, then weight isn’t as much of an issue. Still, it’s nice to set the duffel as the limits so that you don’t overpack. 100L is quite a bit of volume, especially if packing well.
Our goal is always to make sure that you have an excellent family adventure, full of memories and good times, learning and growth for the whole family. If you would like to know more, please sign up for our mailing list and stay tuned to more great tips, ideas, and getaways. We hope to see you out there!

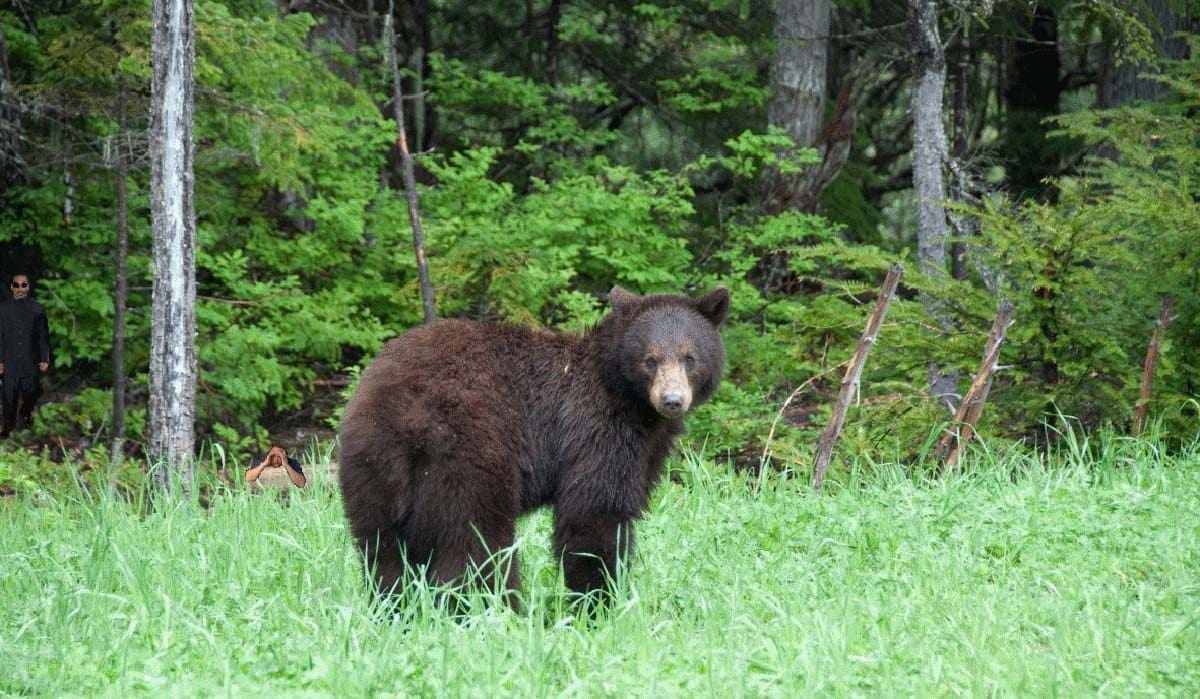
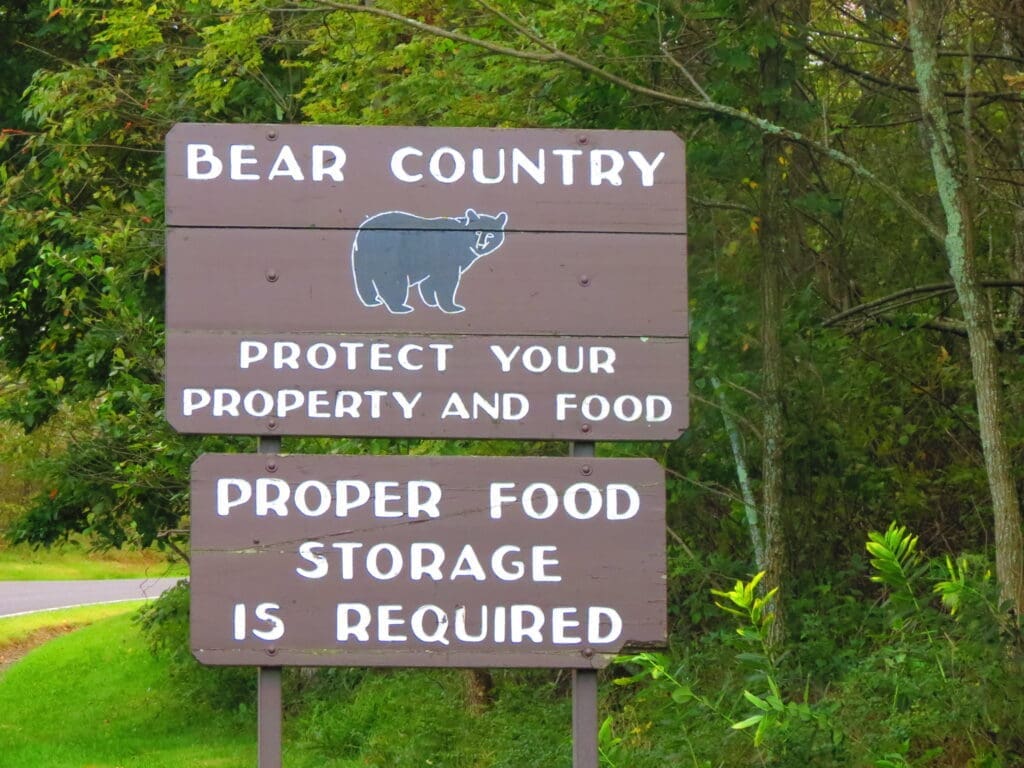
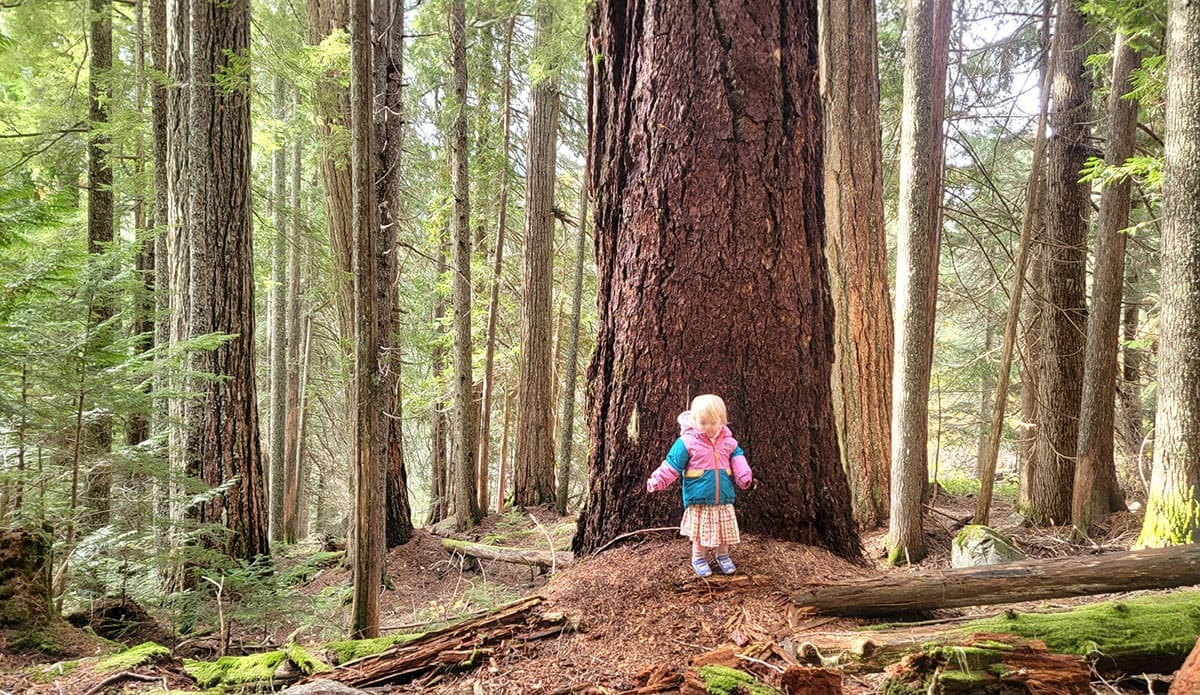
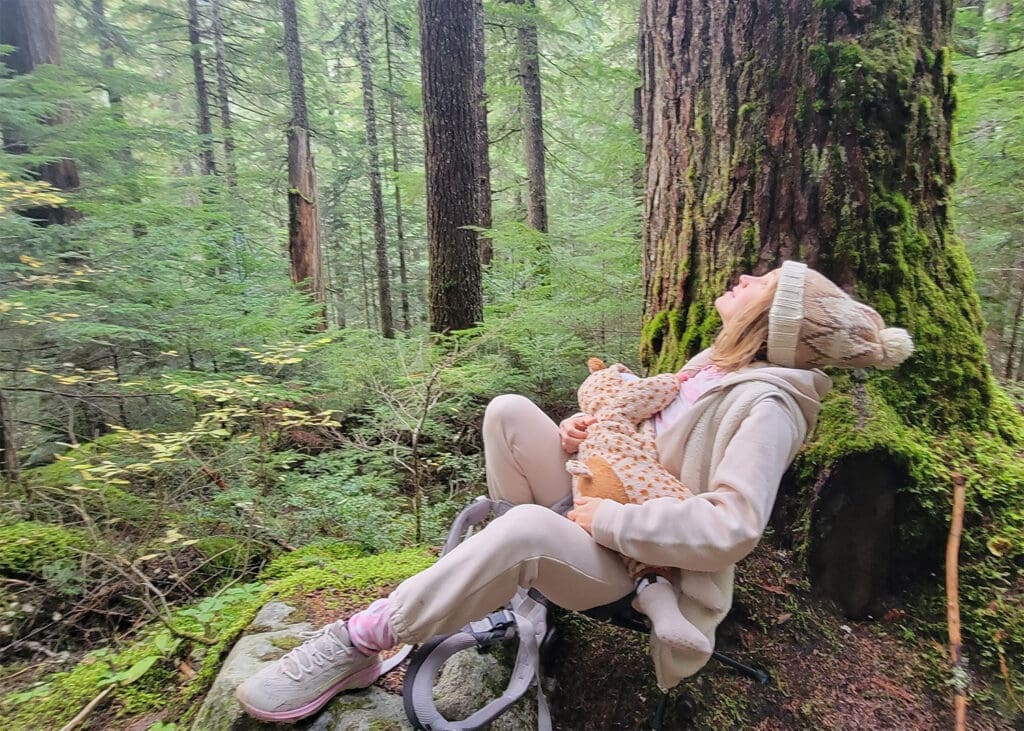
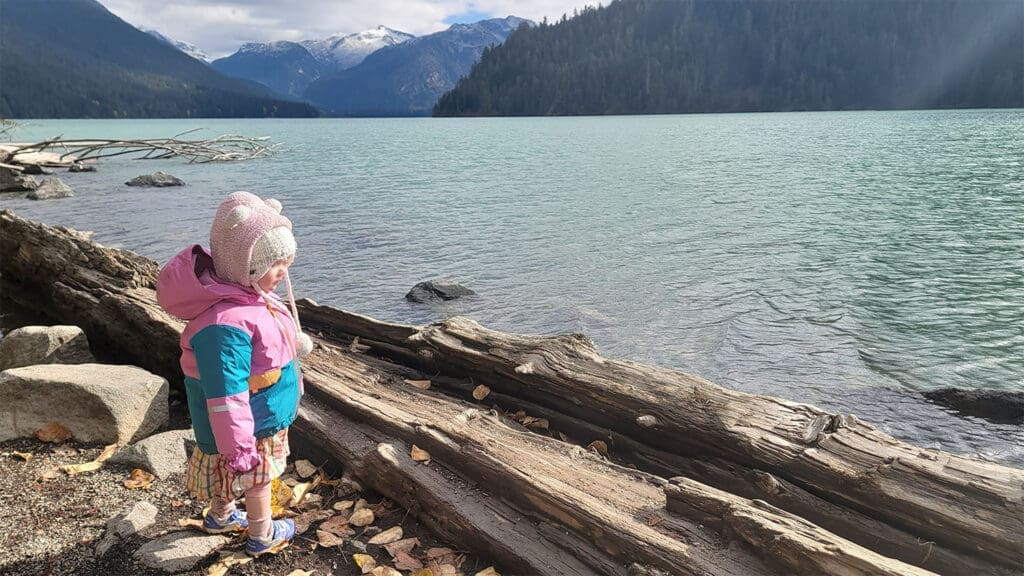
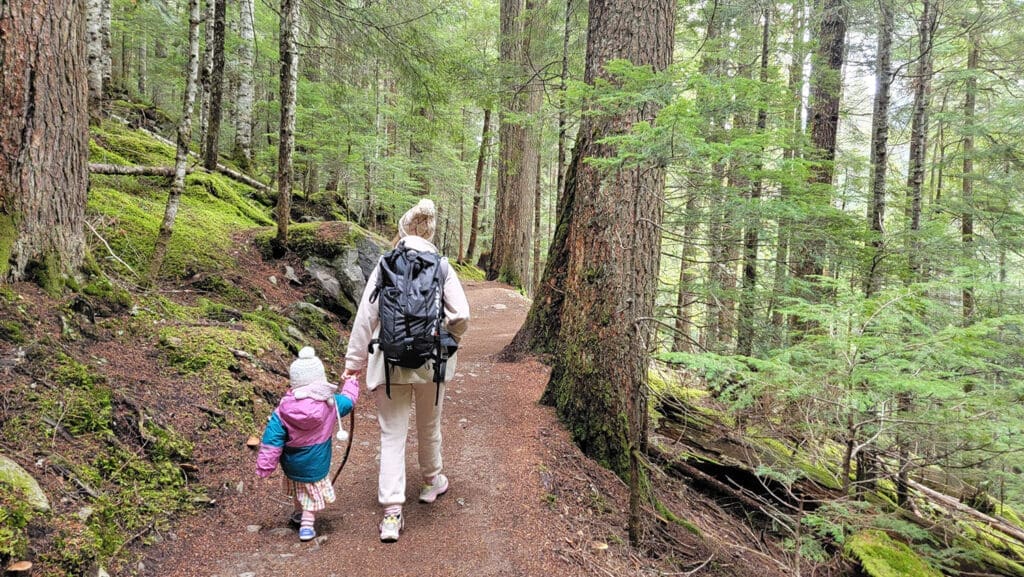
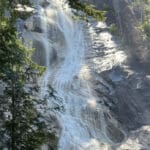
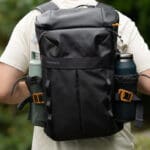

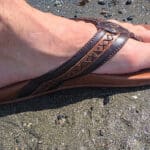
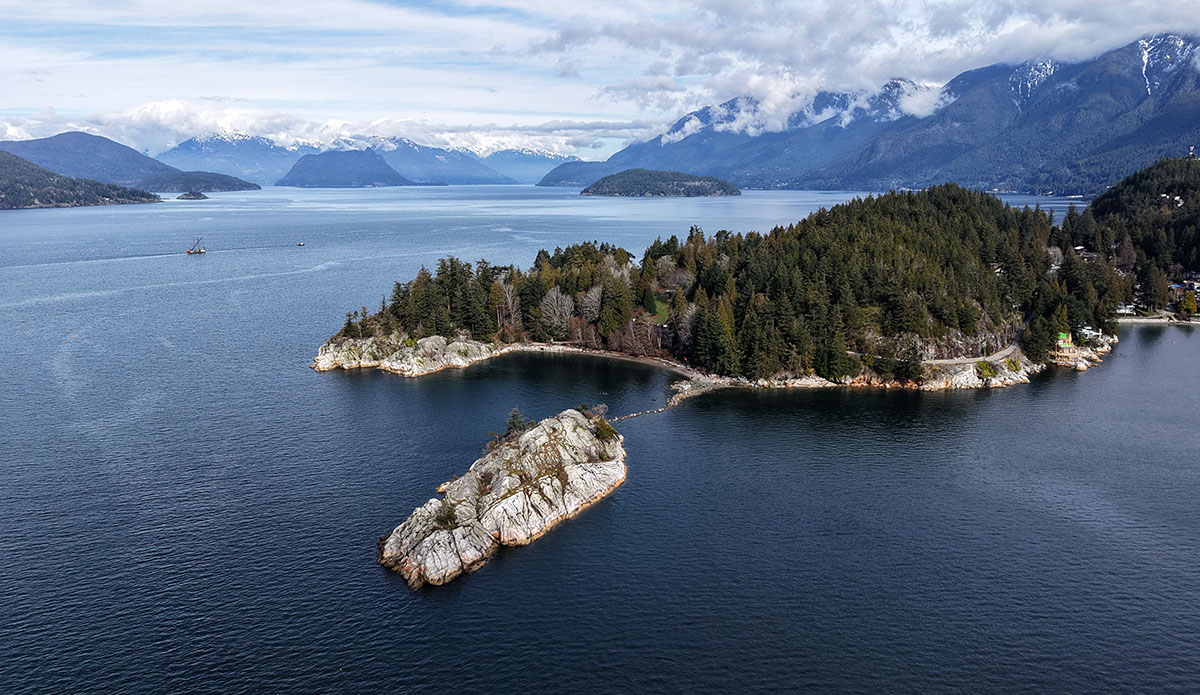
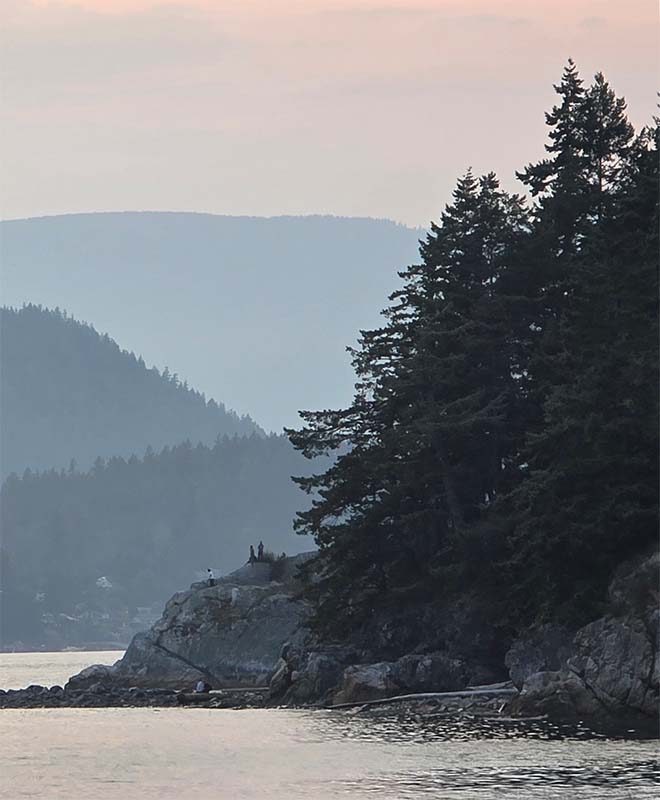
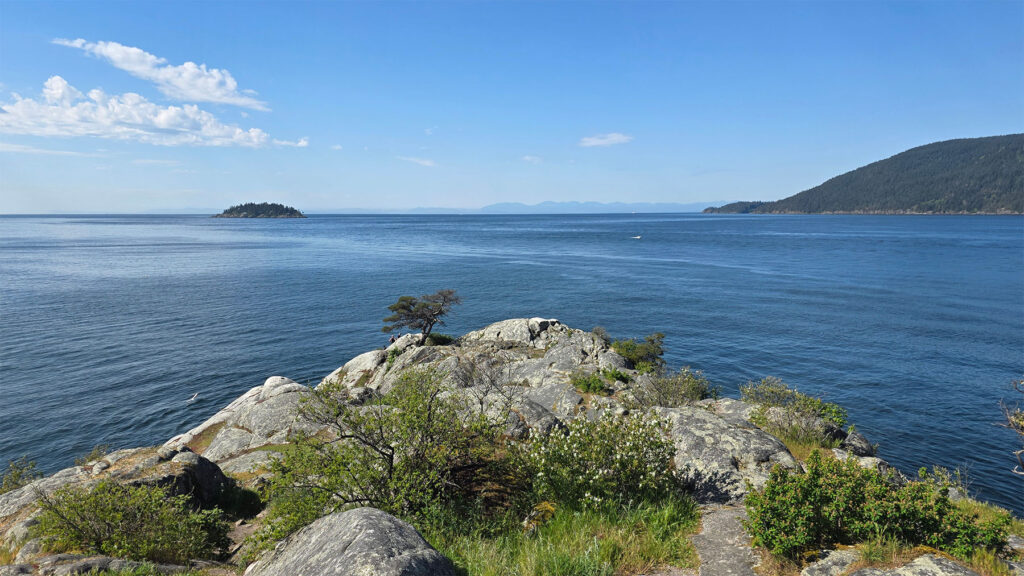
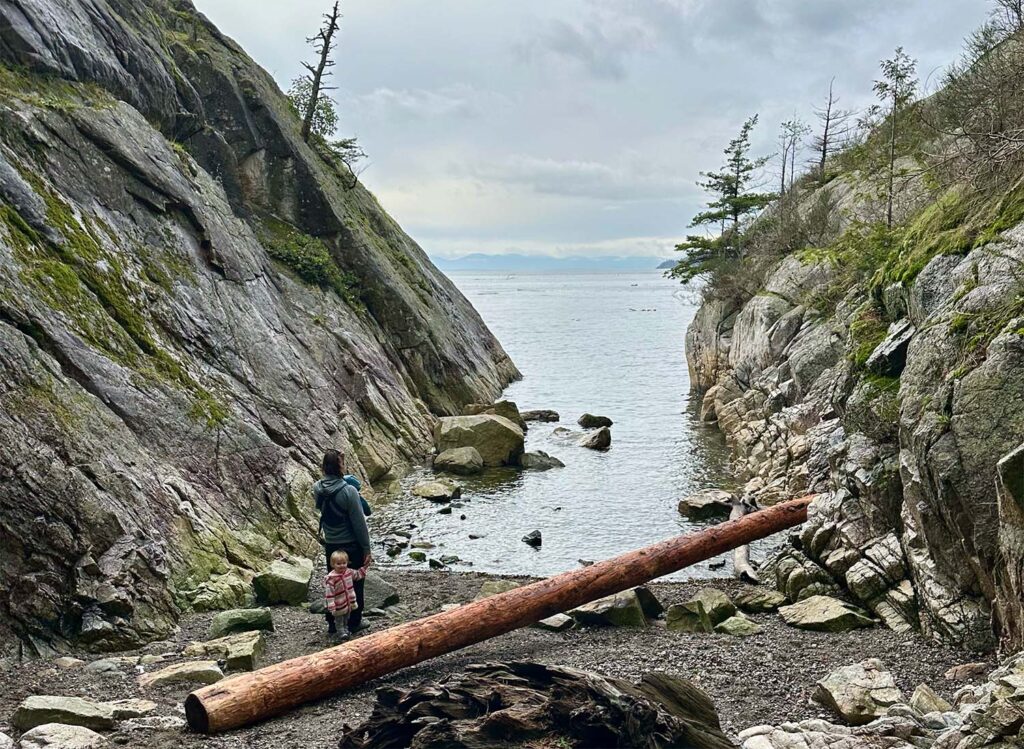
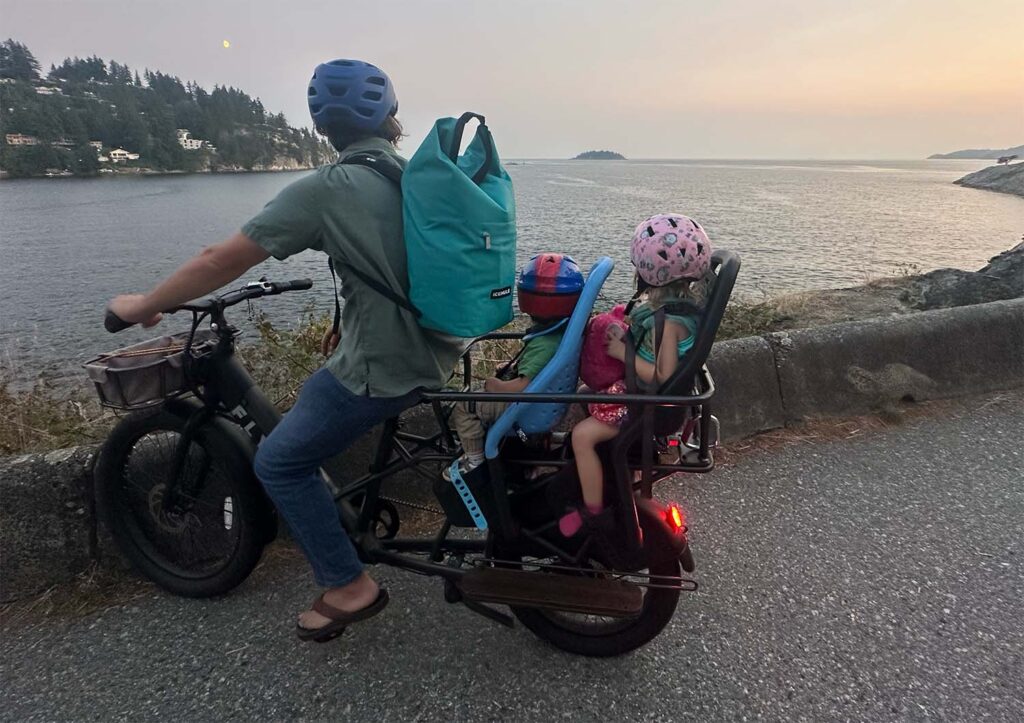
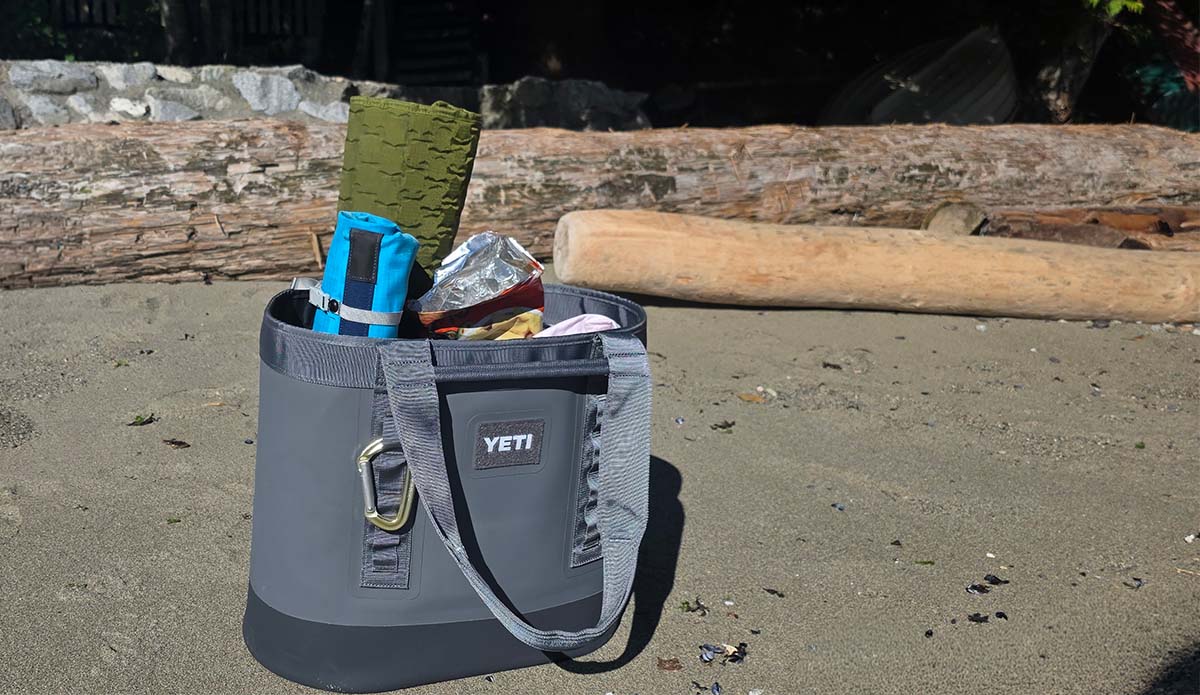
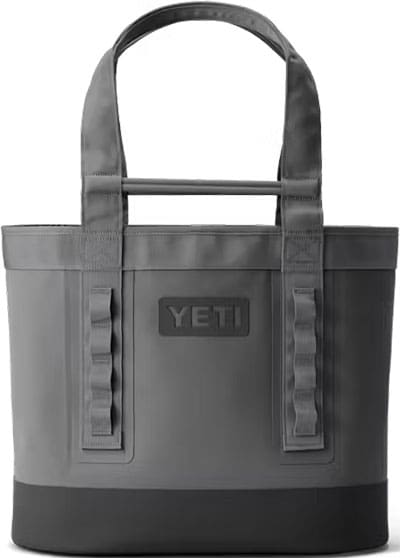
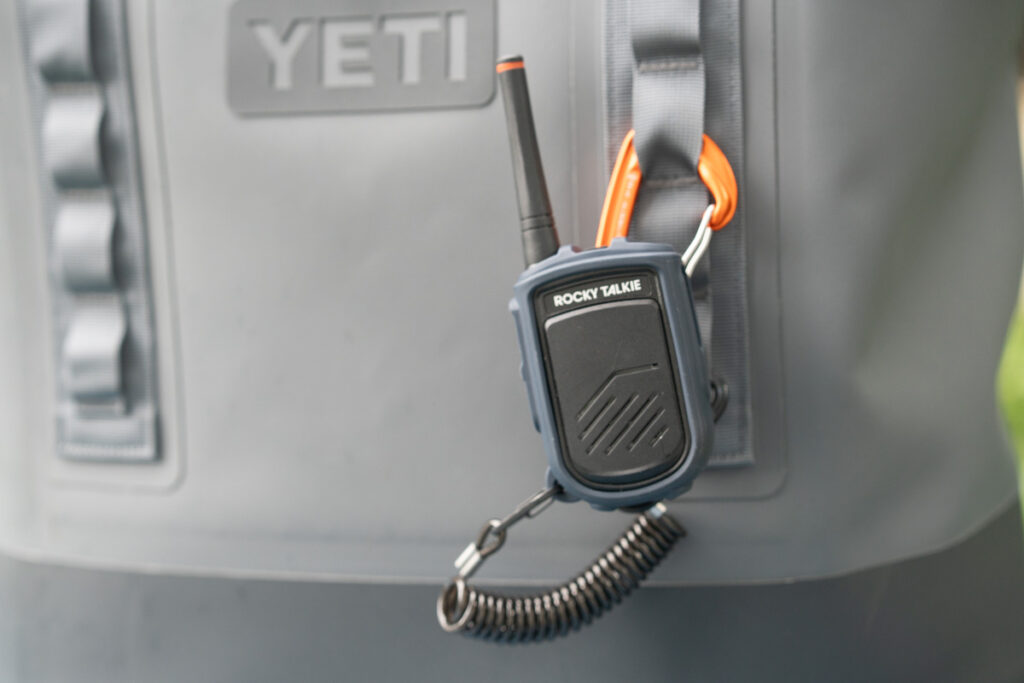
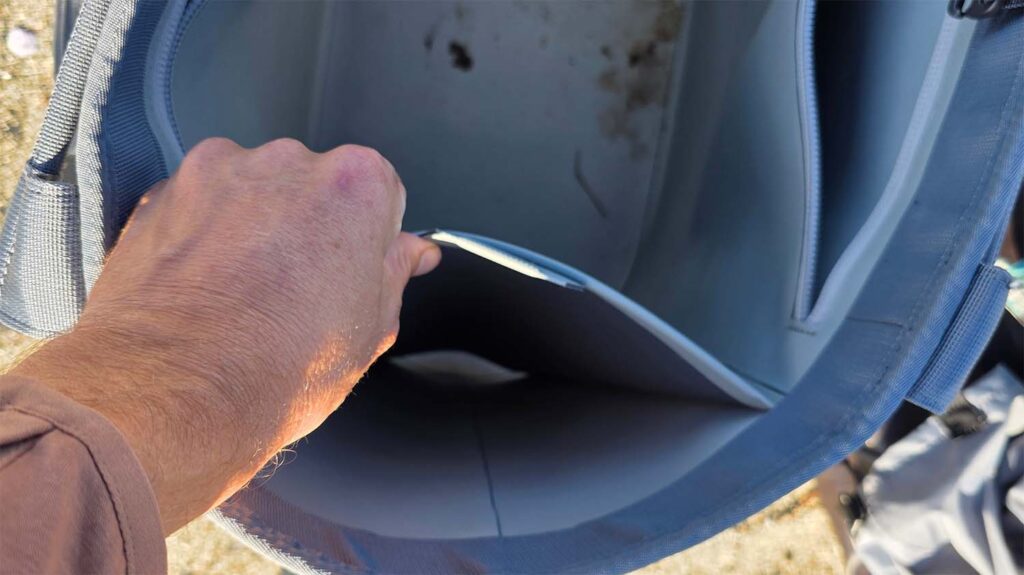
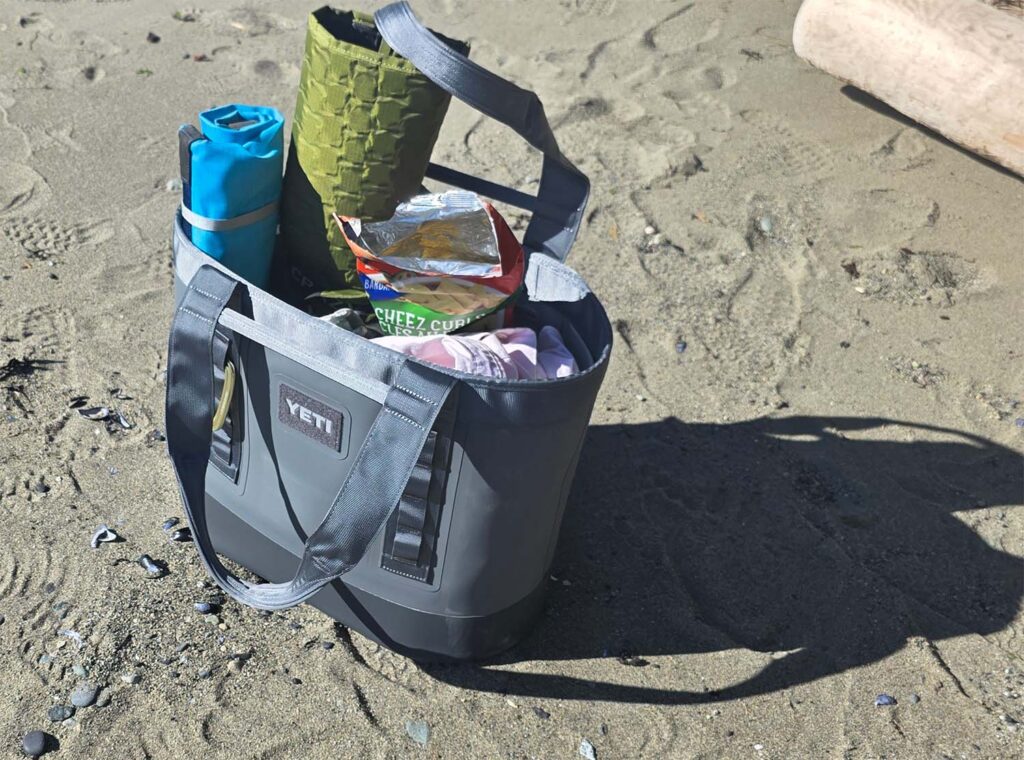
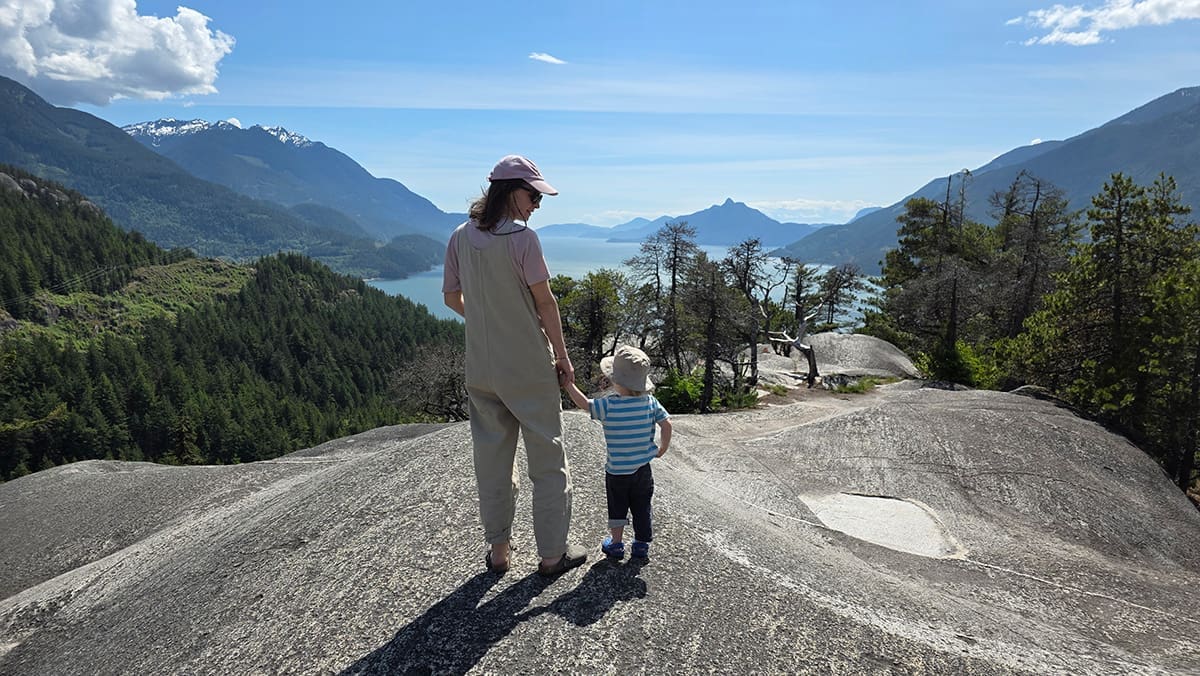
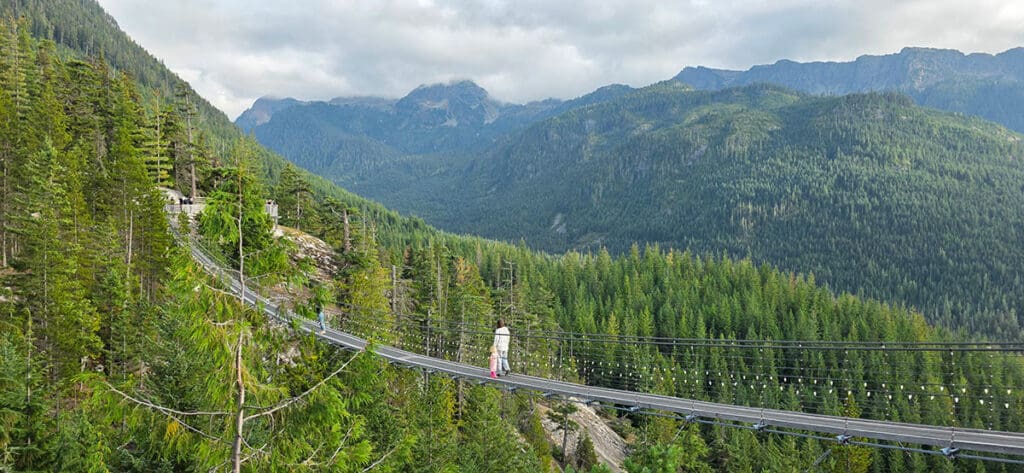
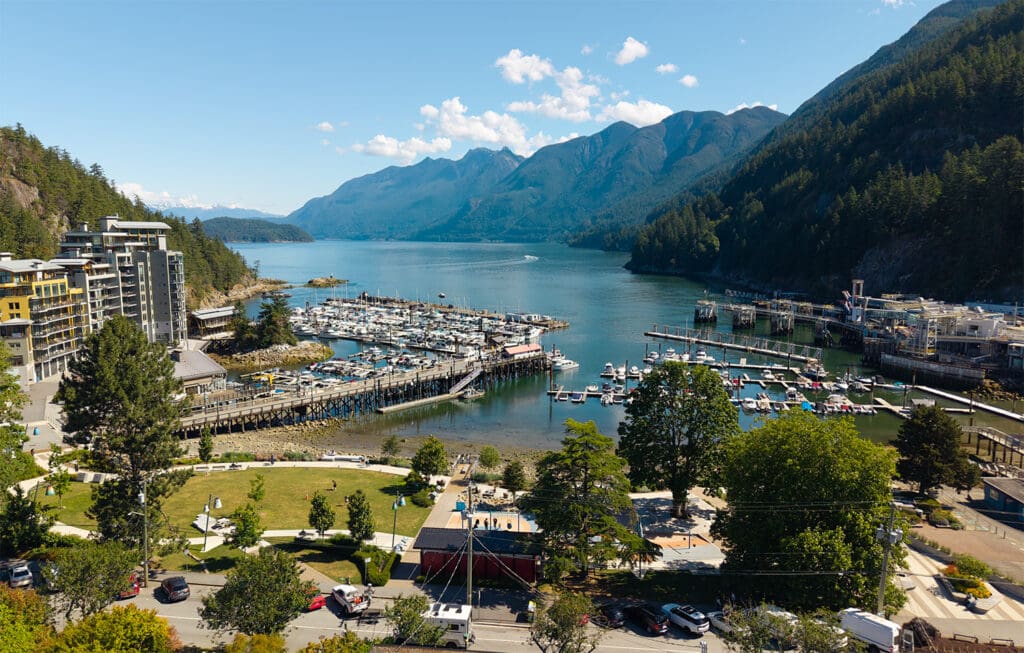

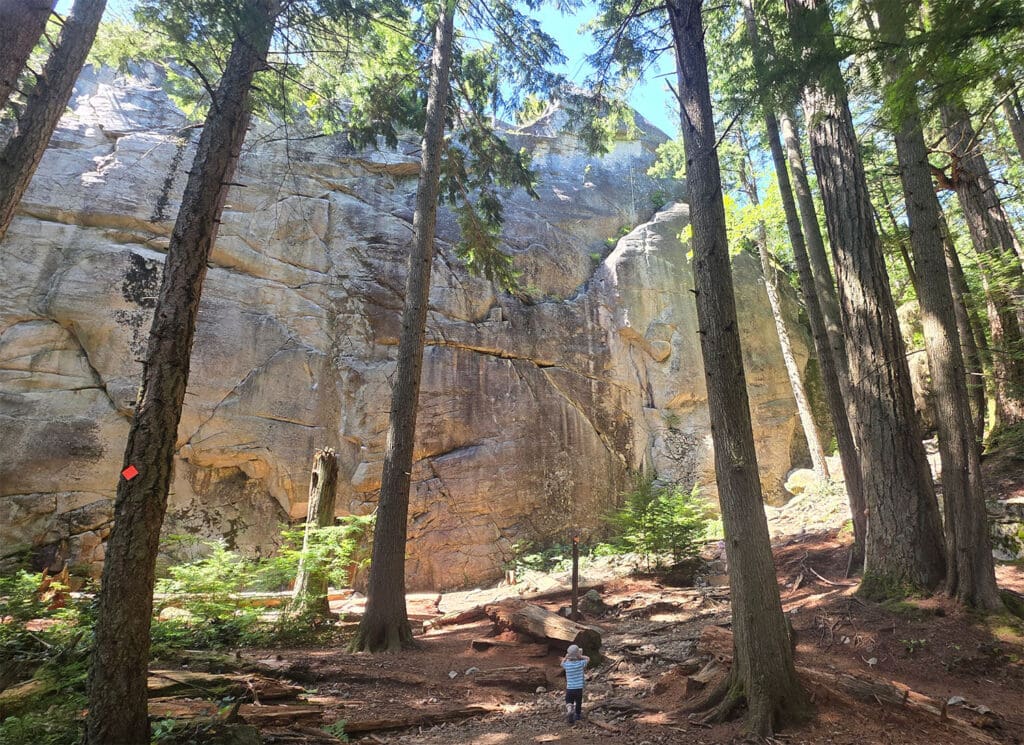
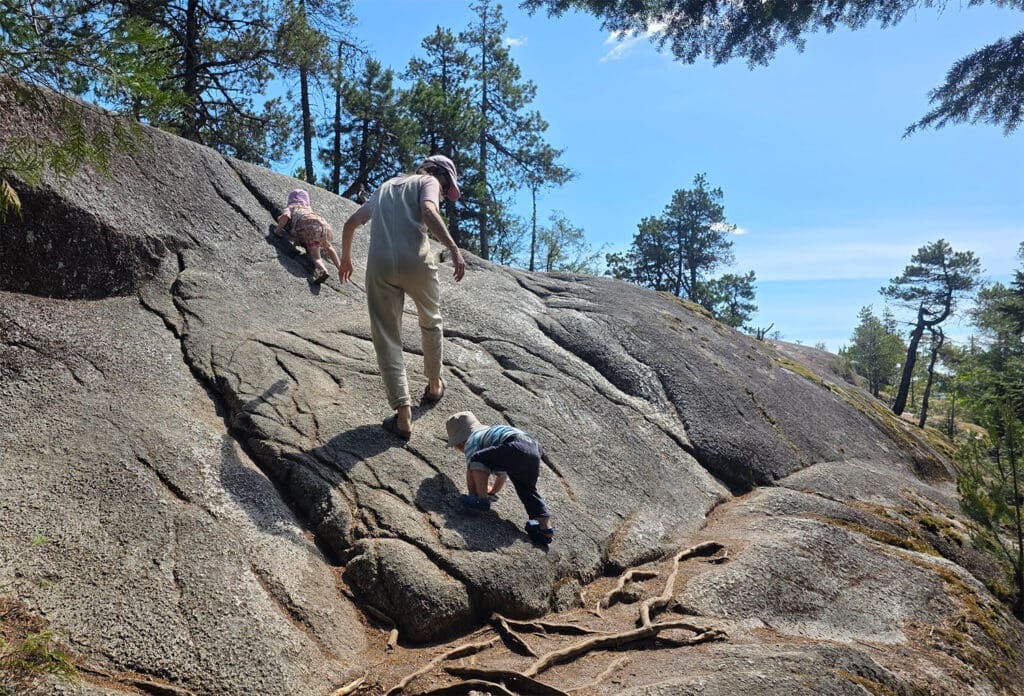
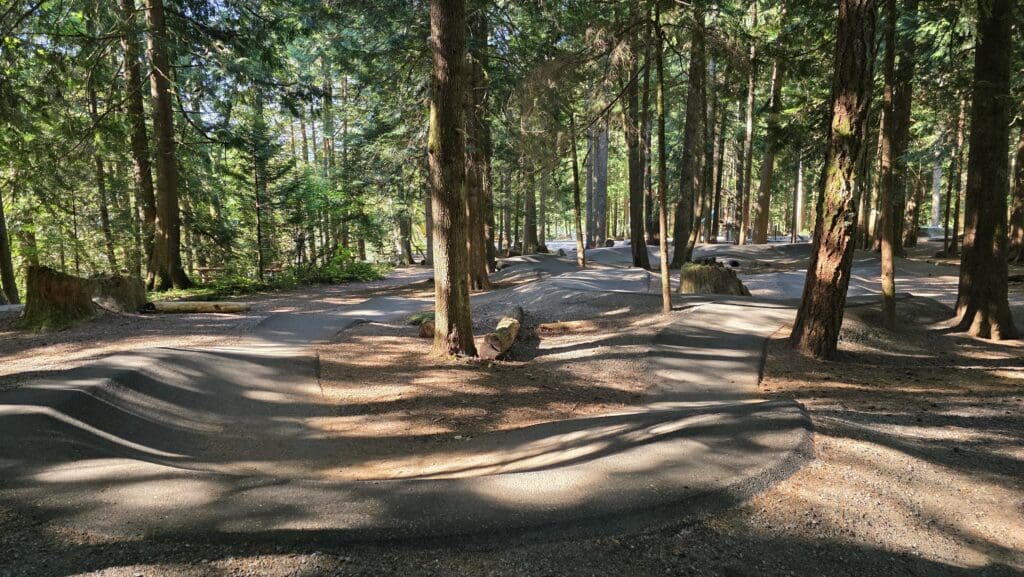
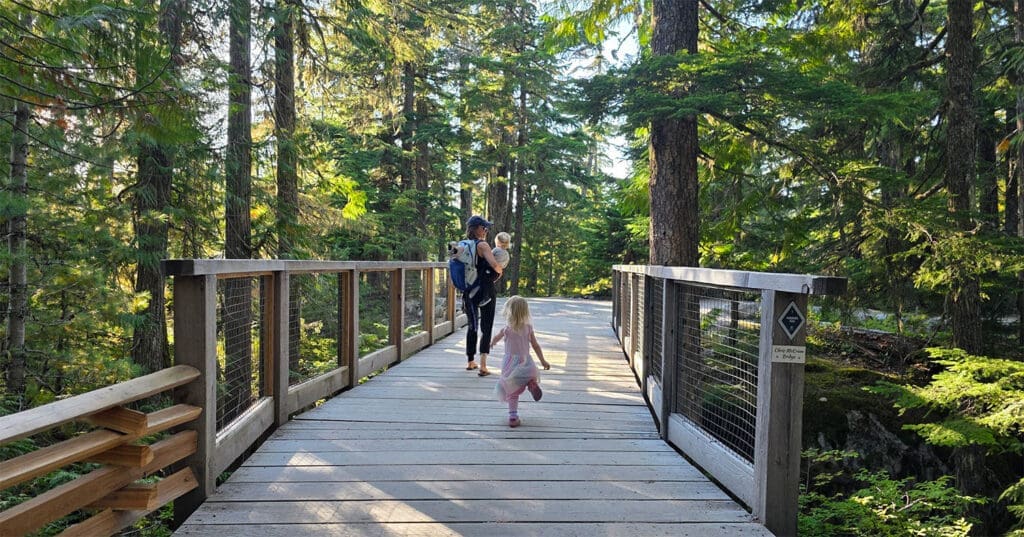



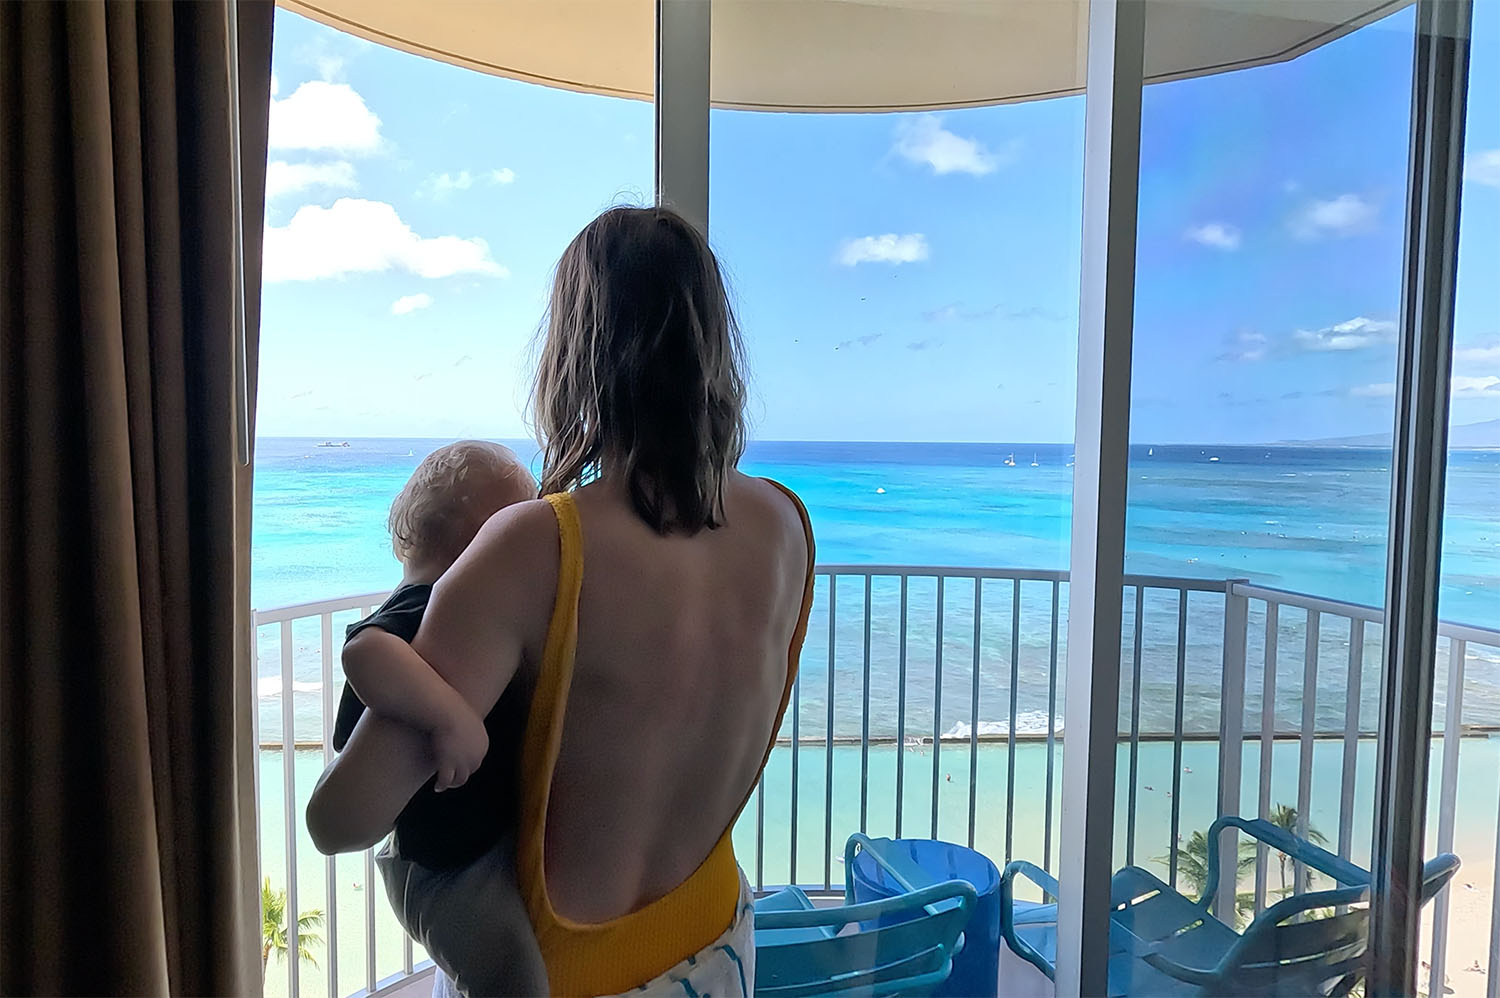
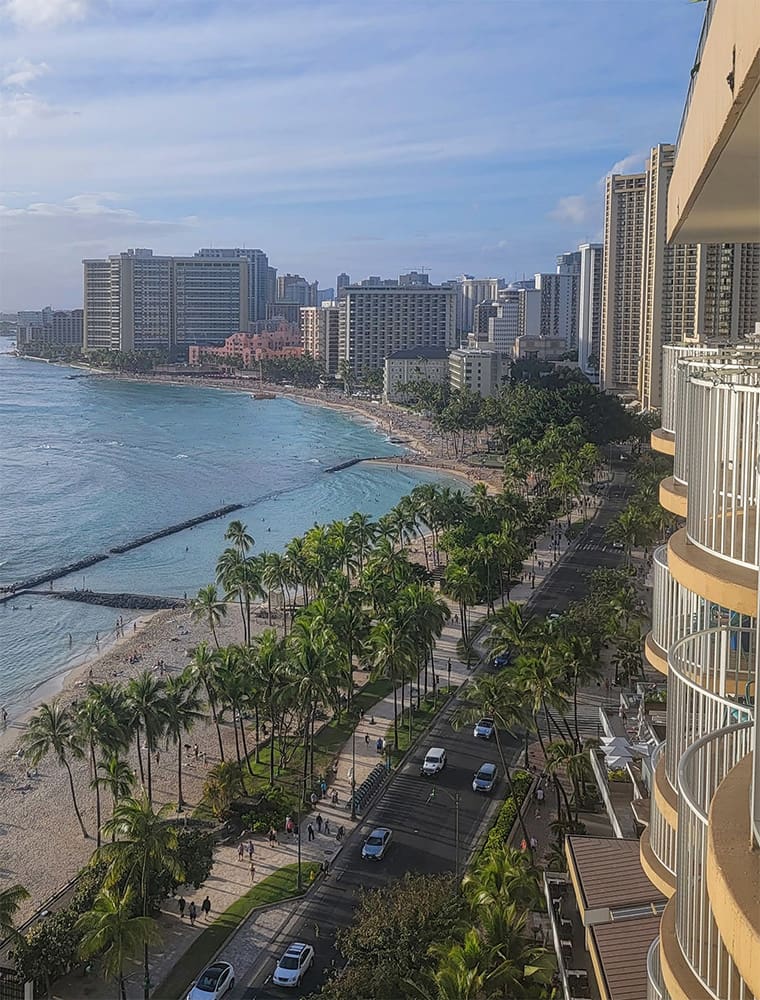
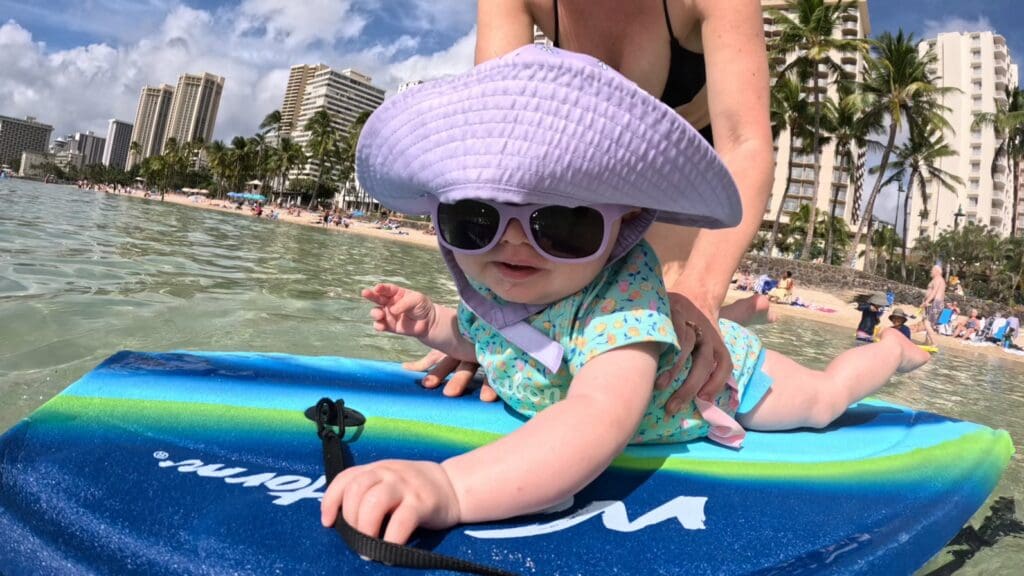

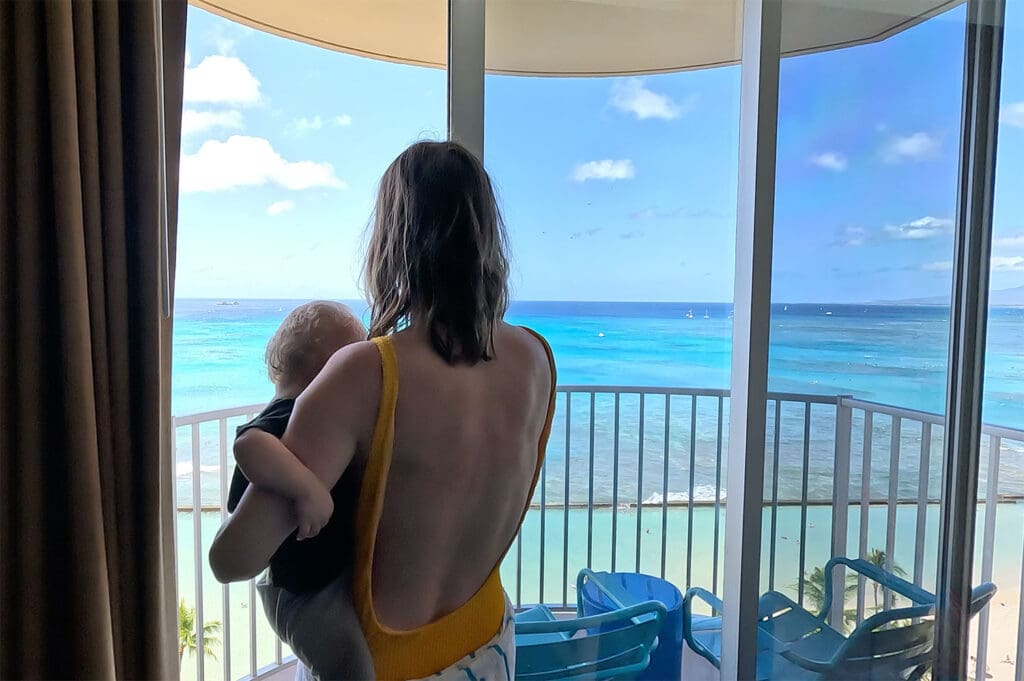
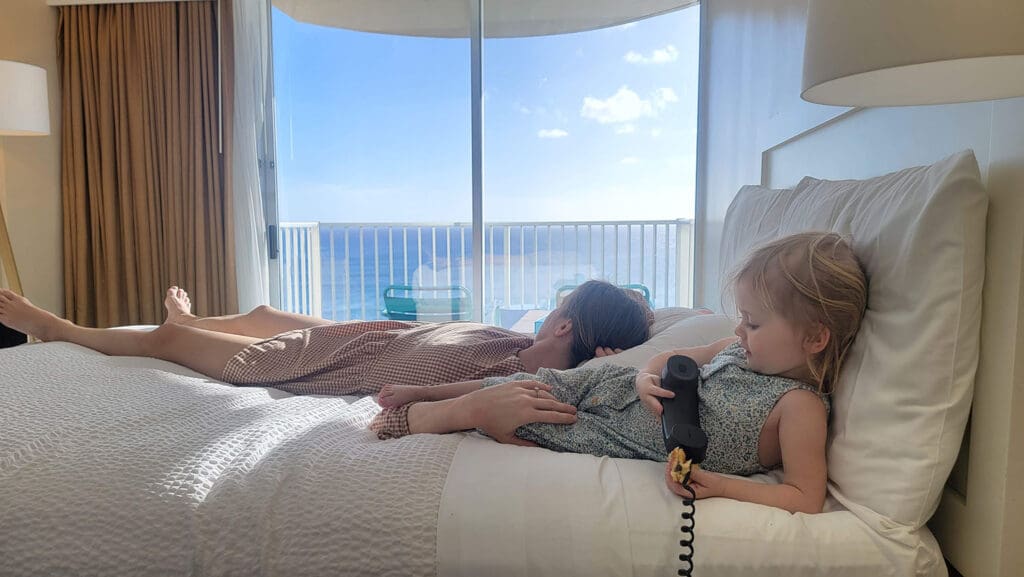
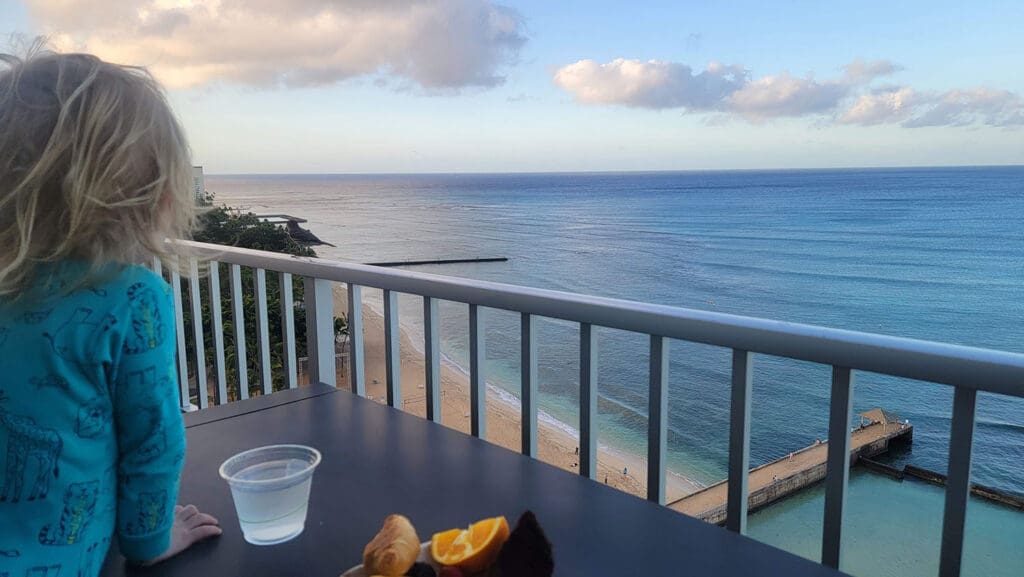
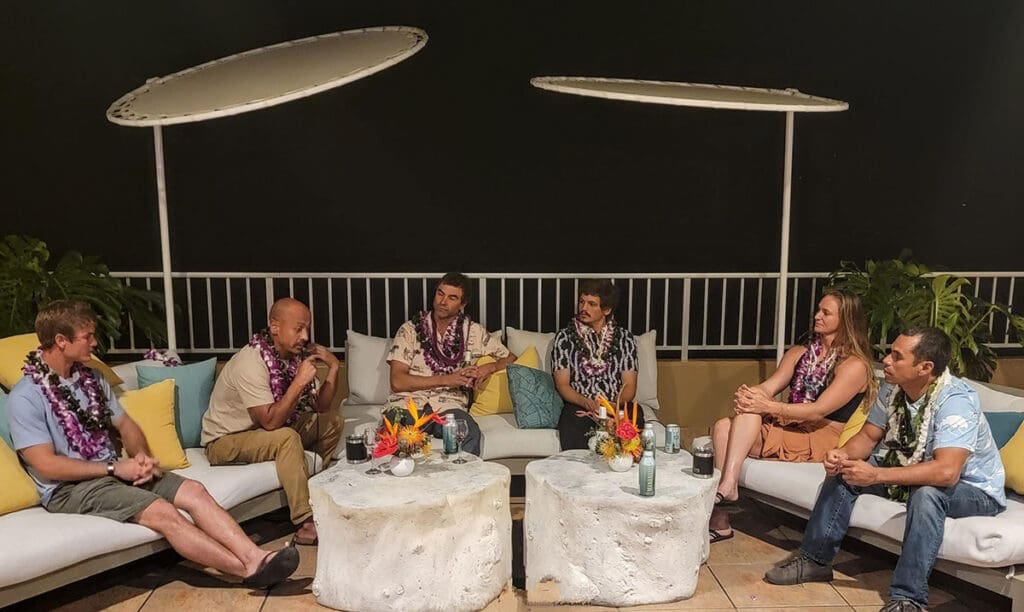

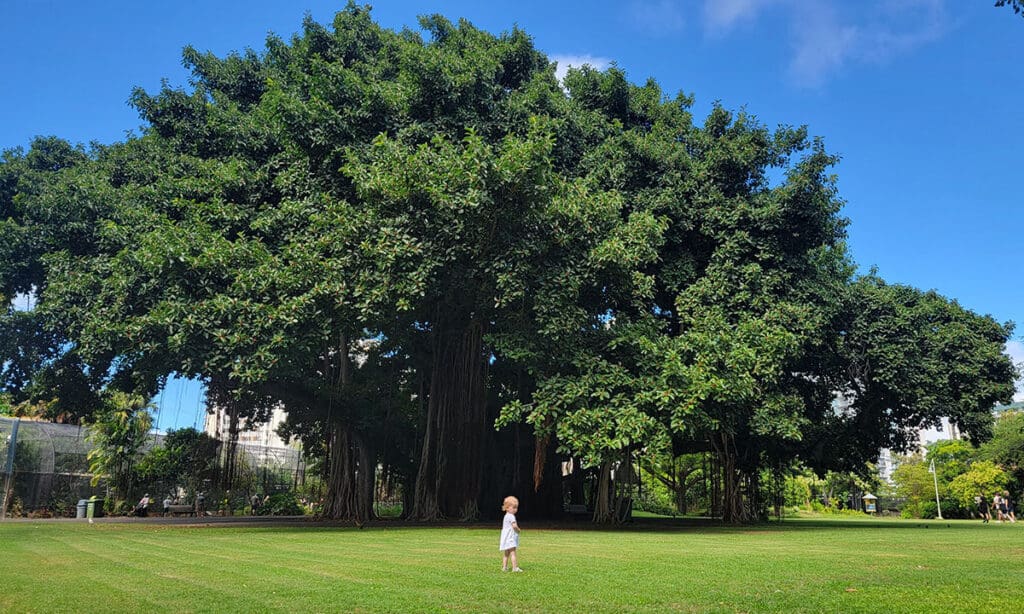


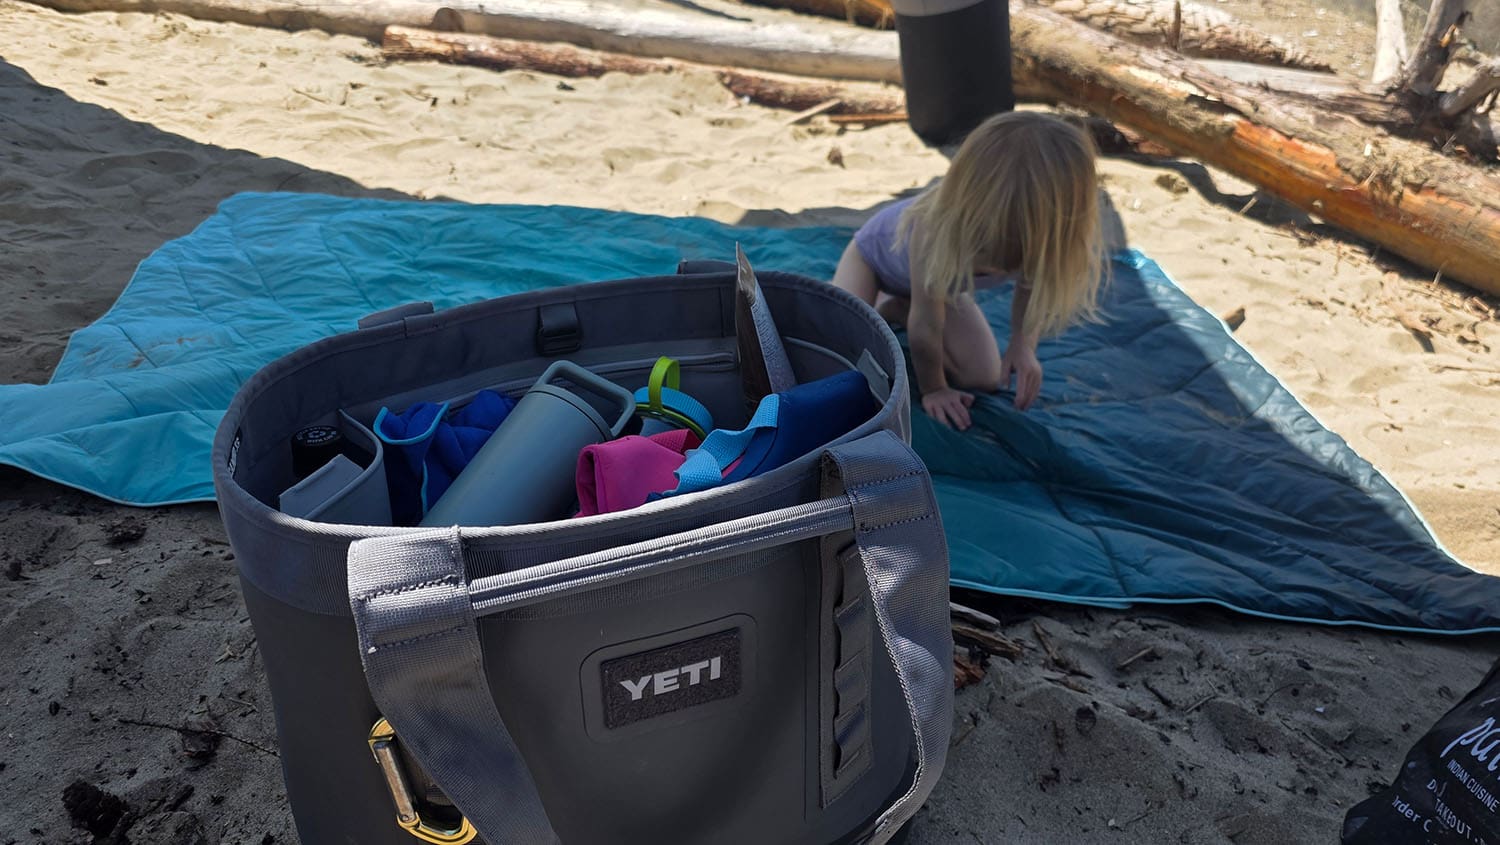
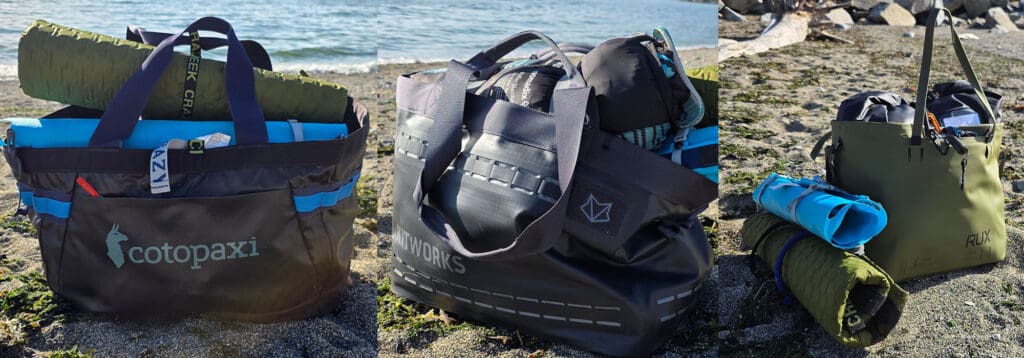
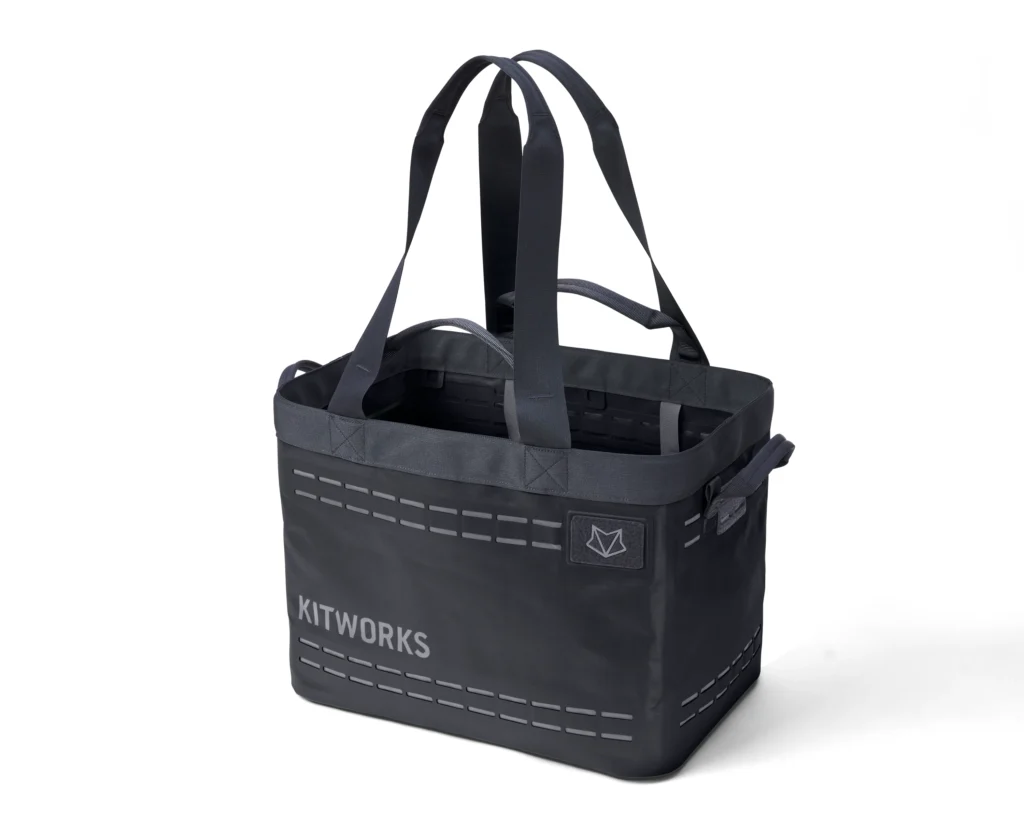
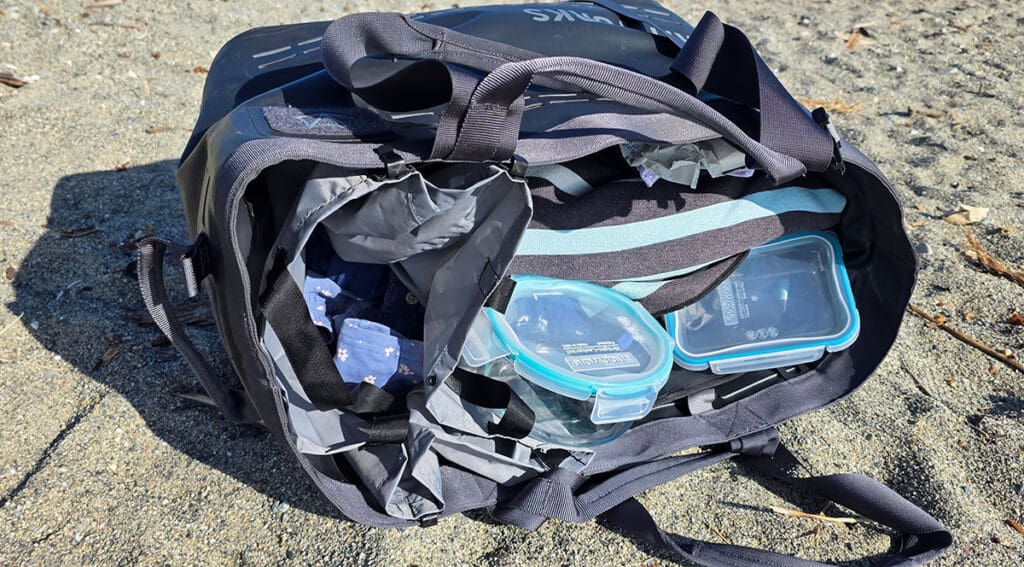
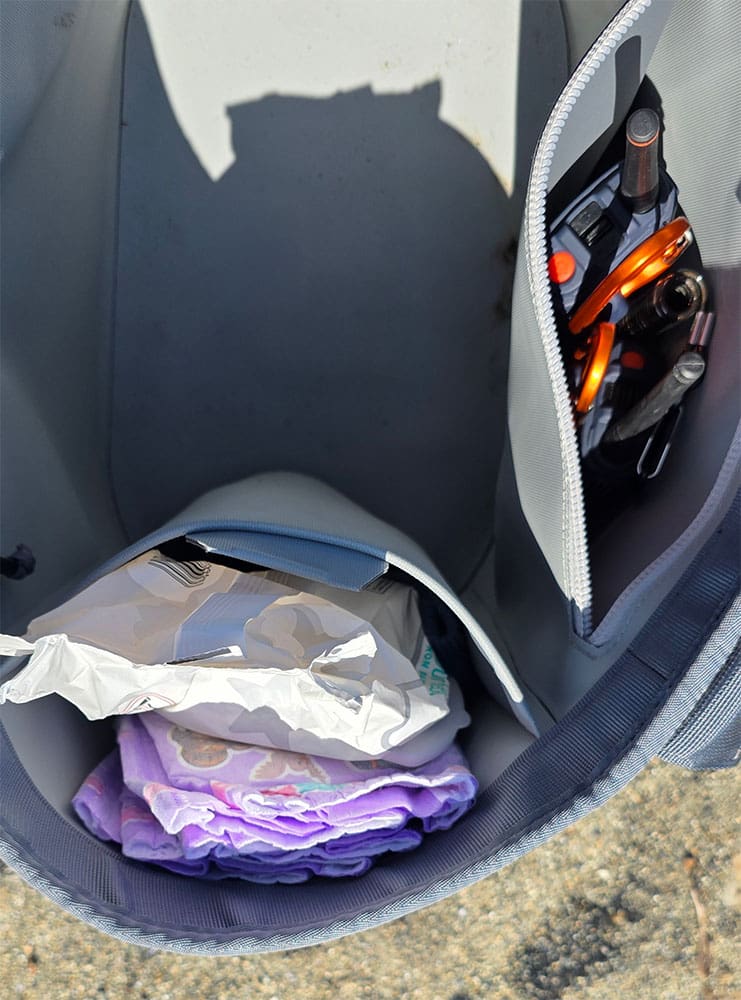
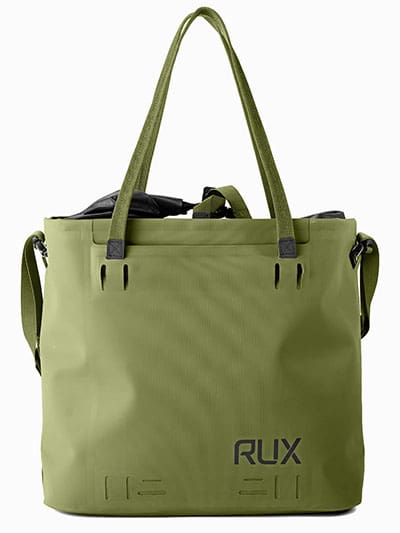
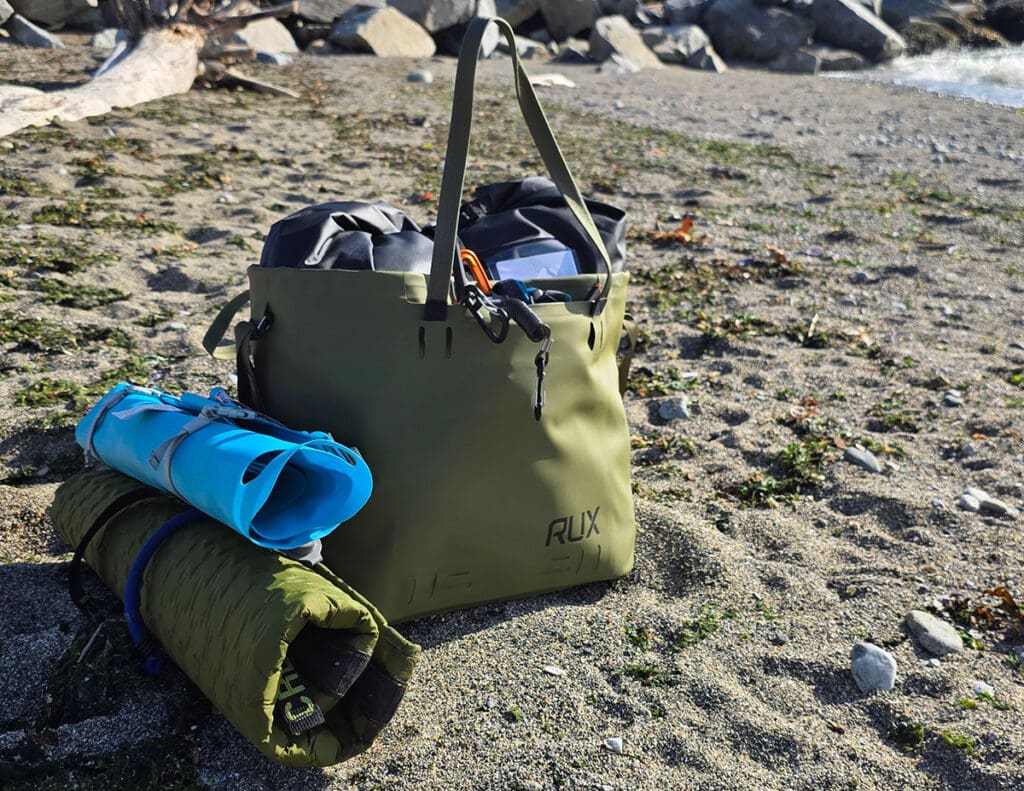
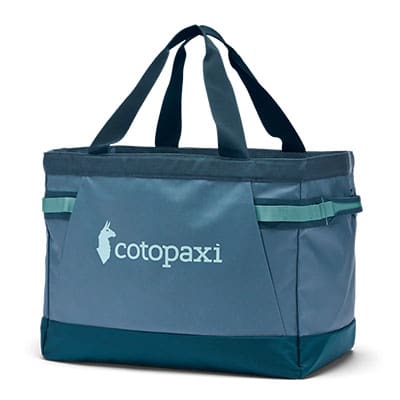
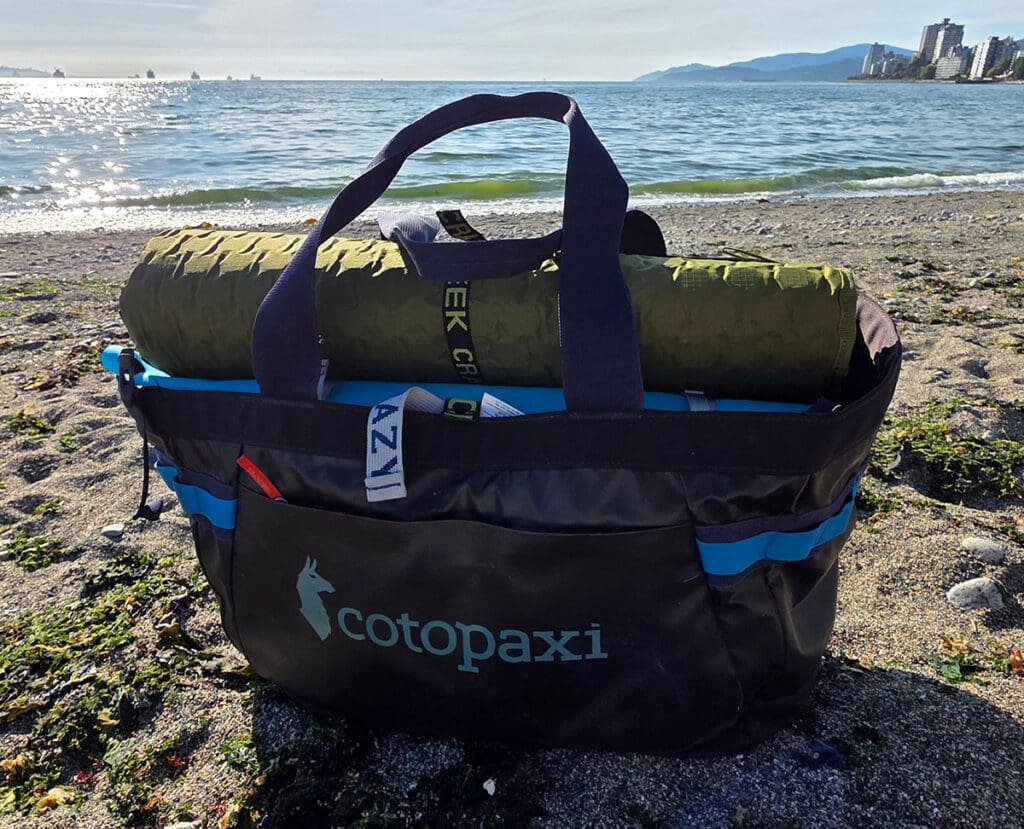
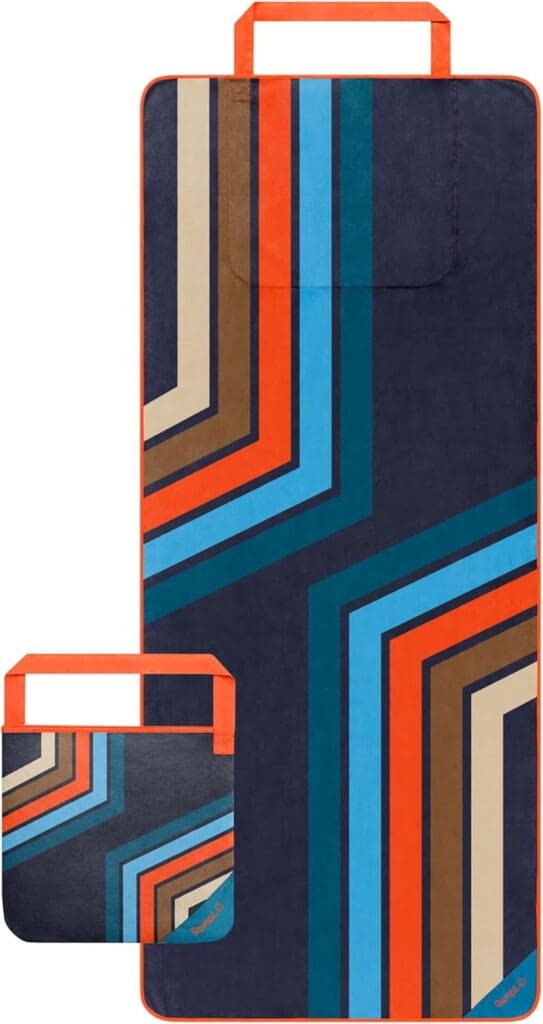
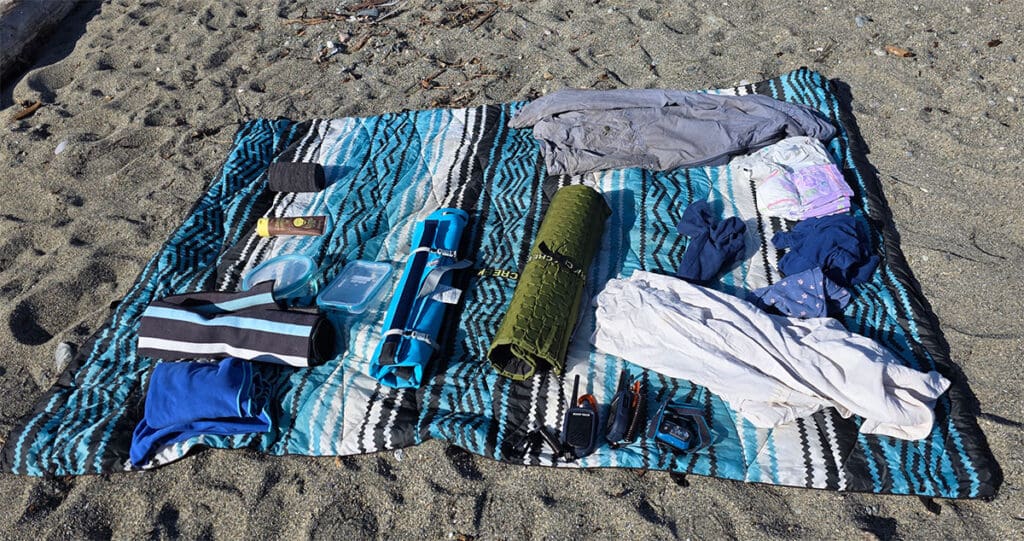
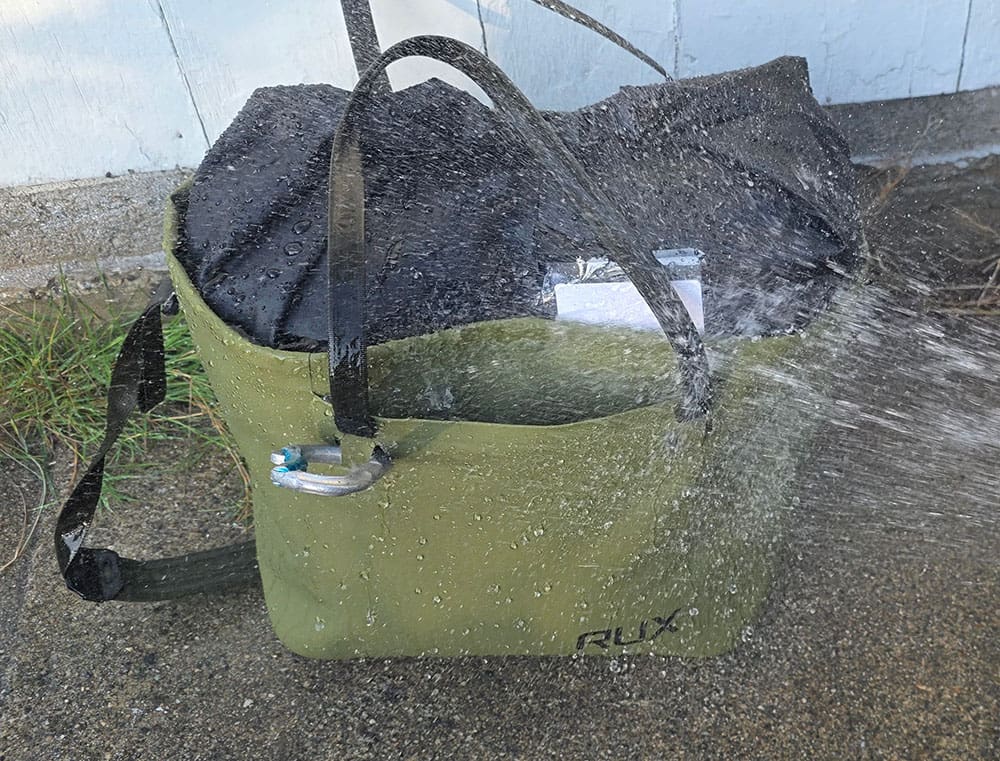
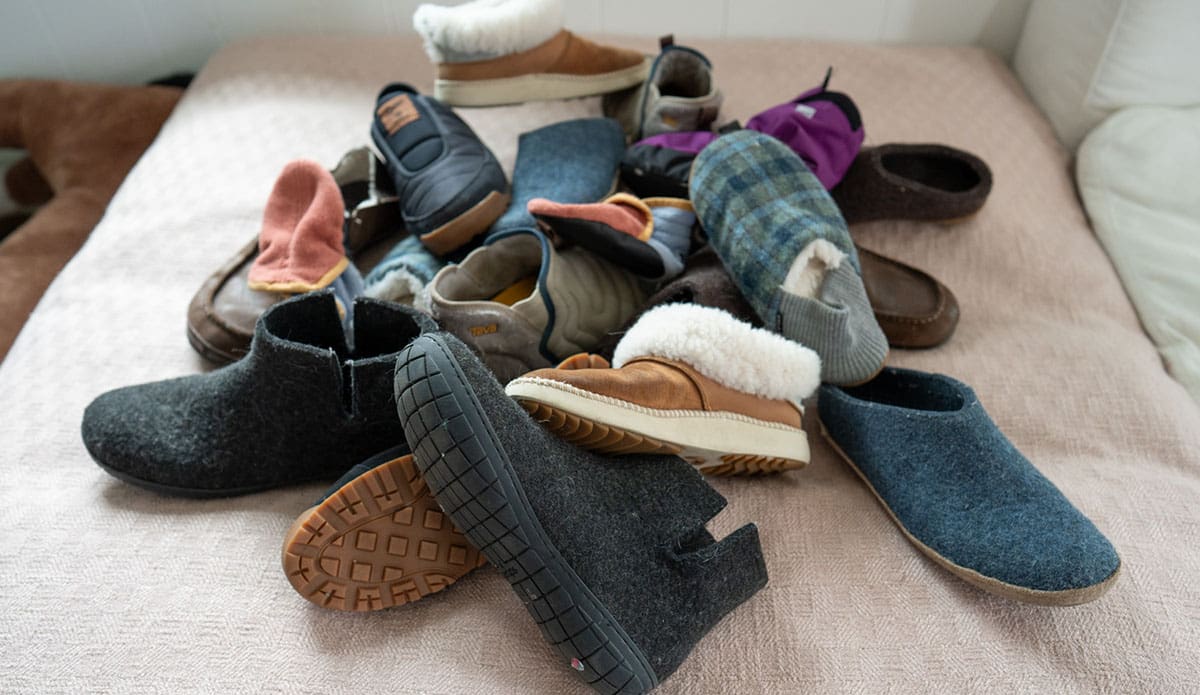
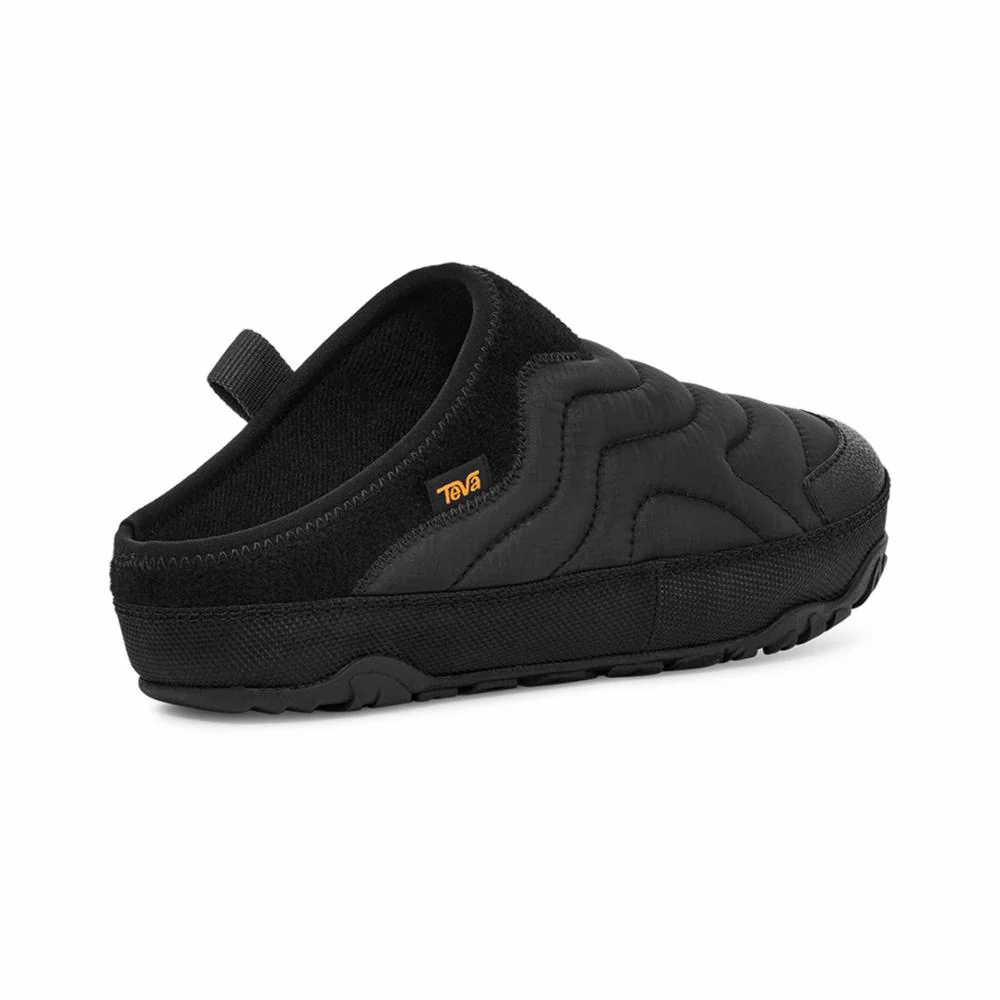
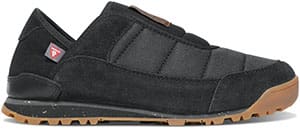
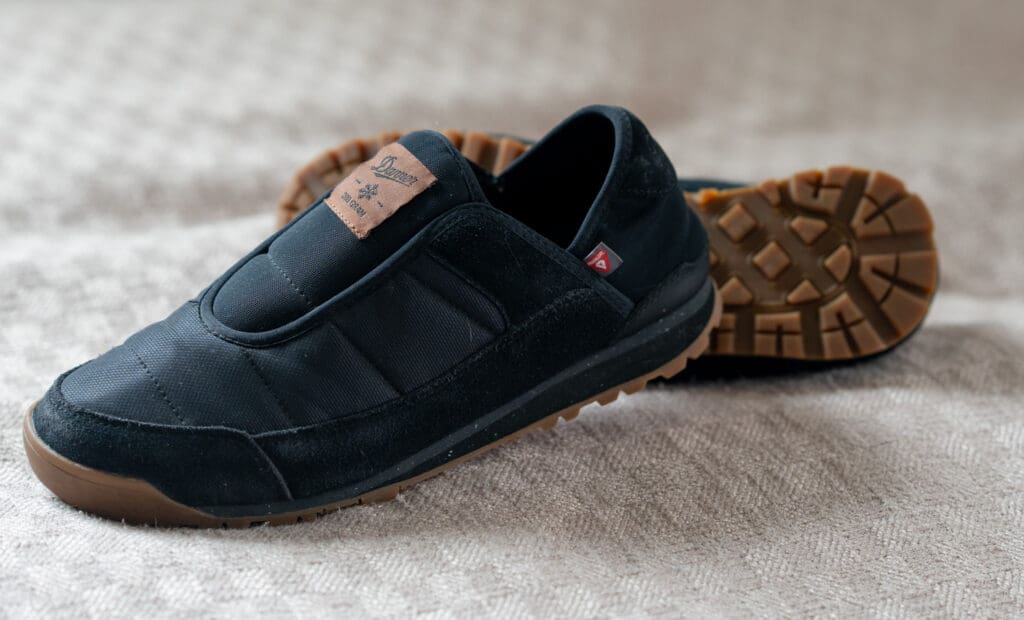
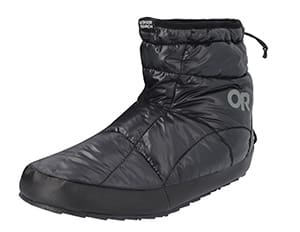
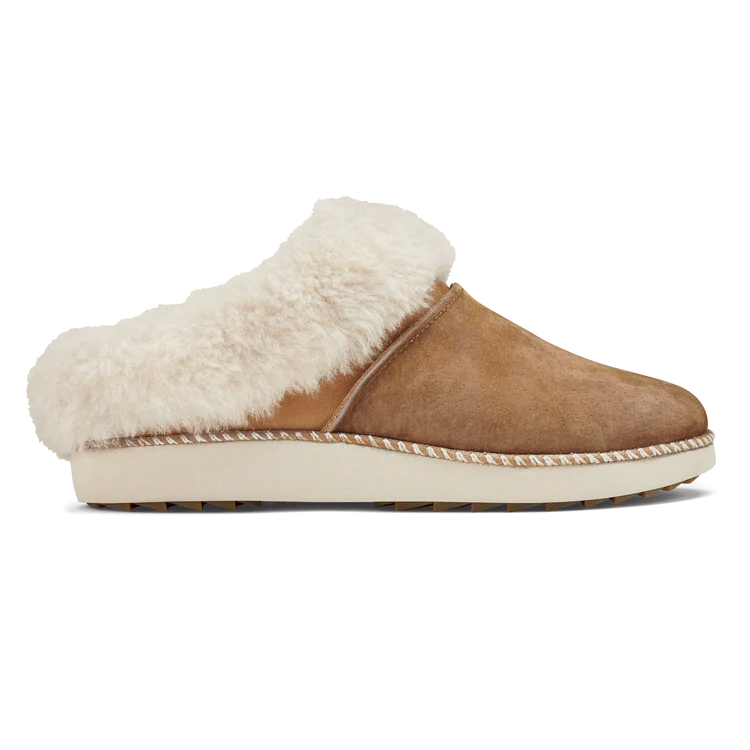
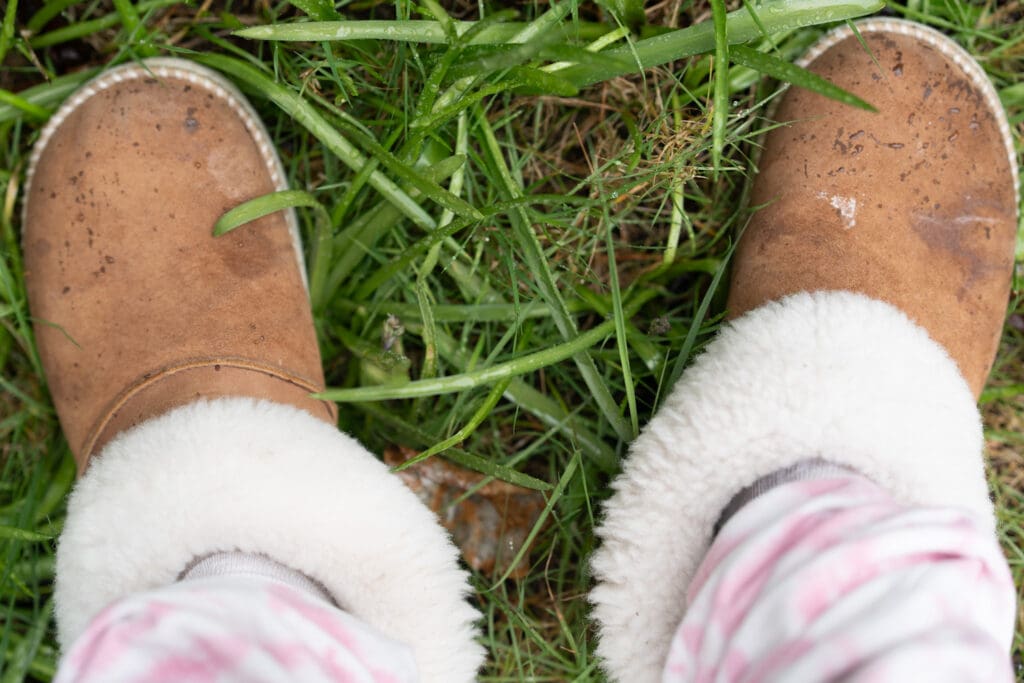
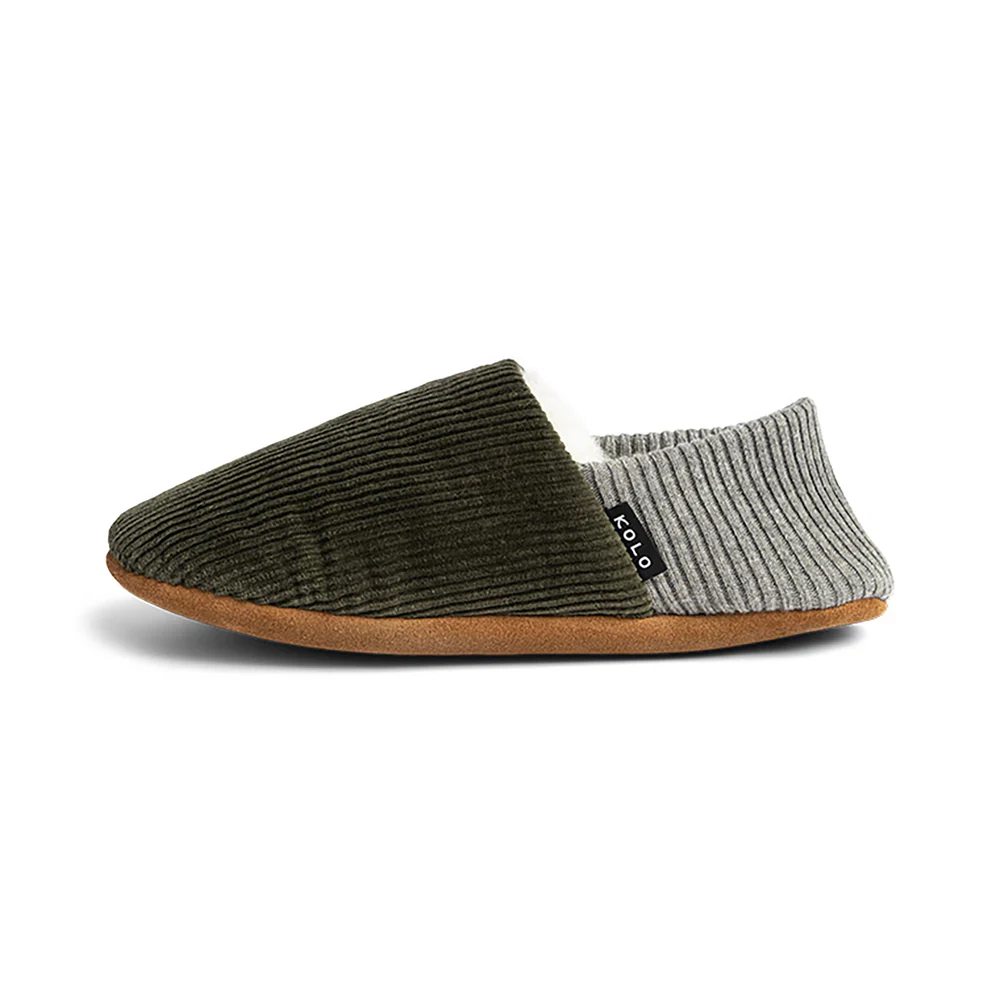
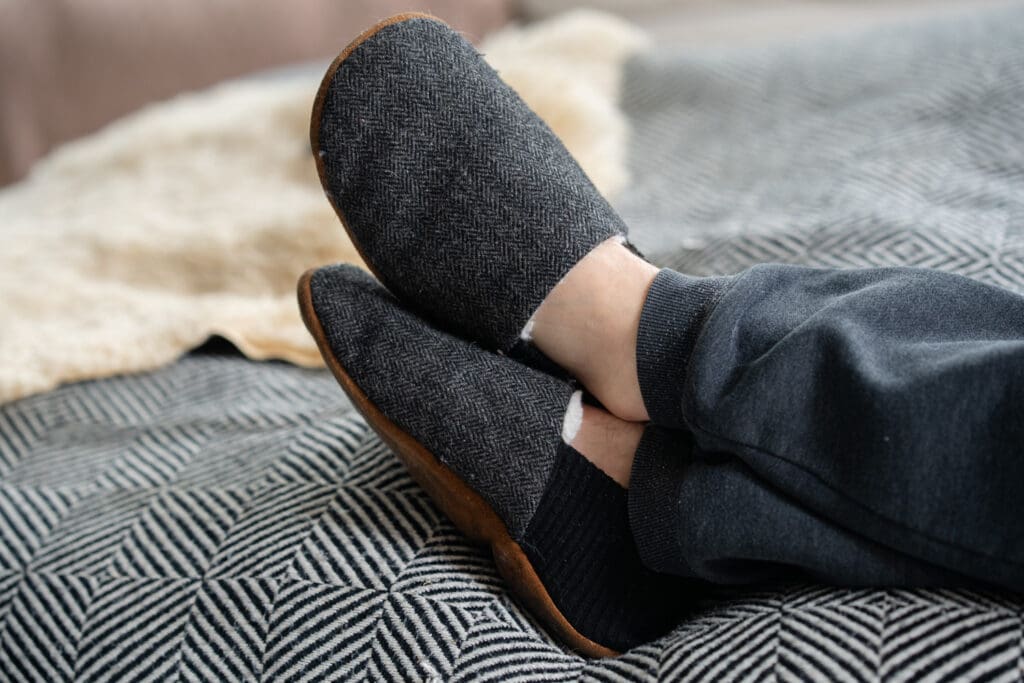
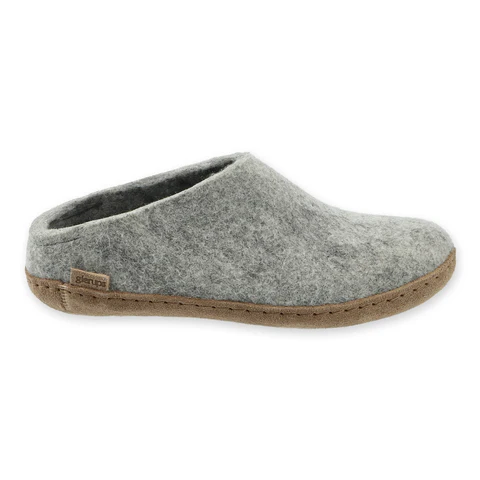
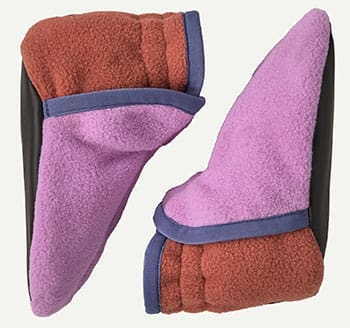
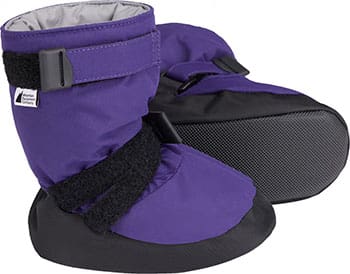
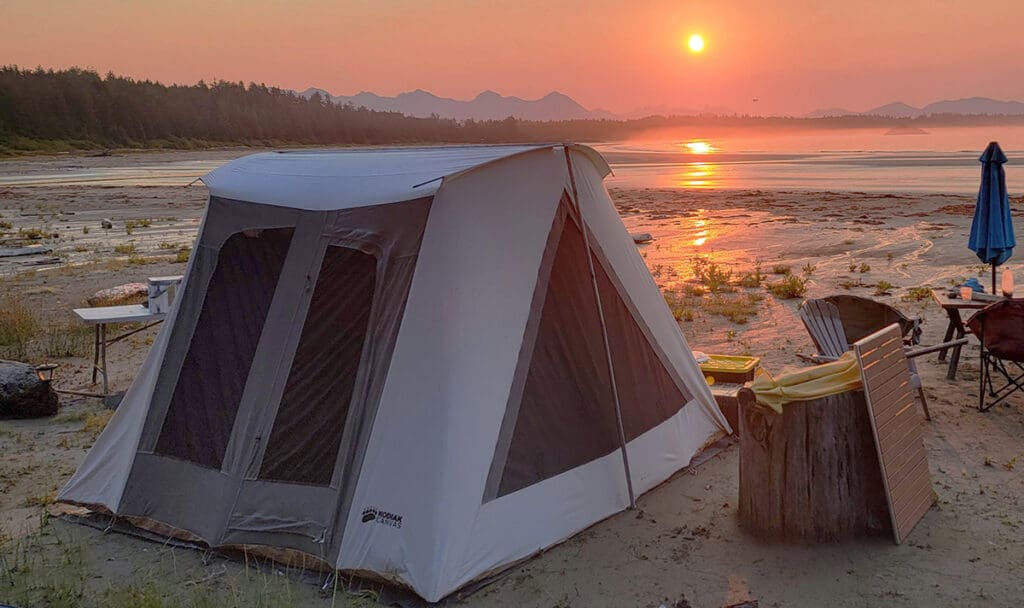
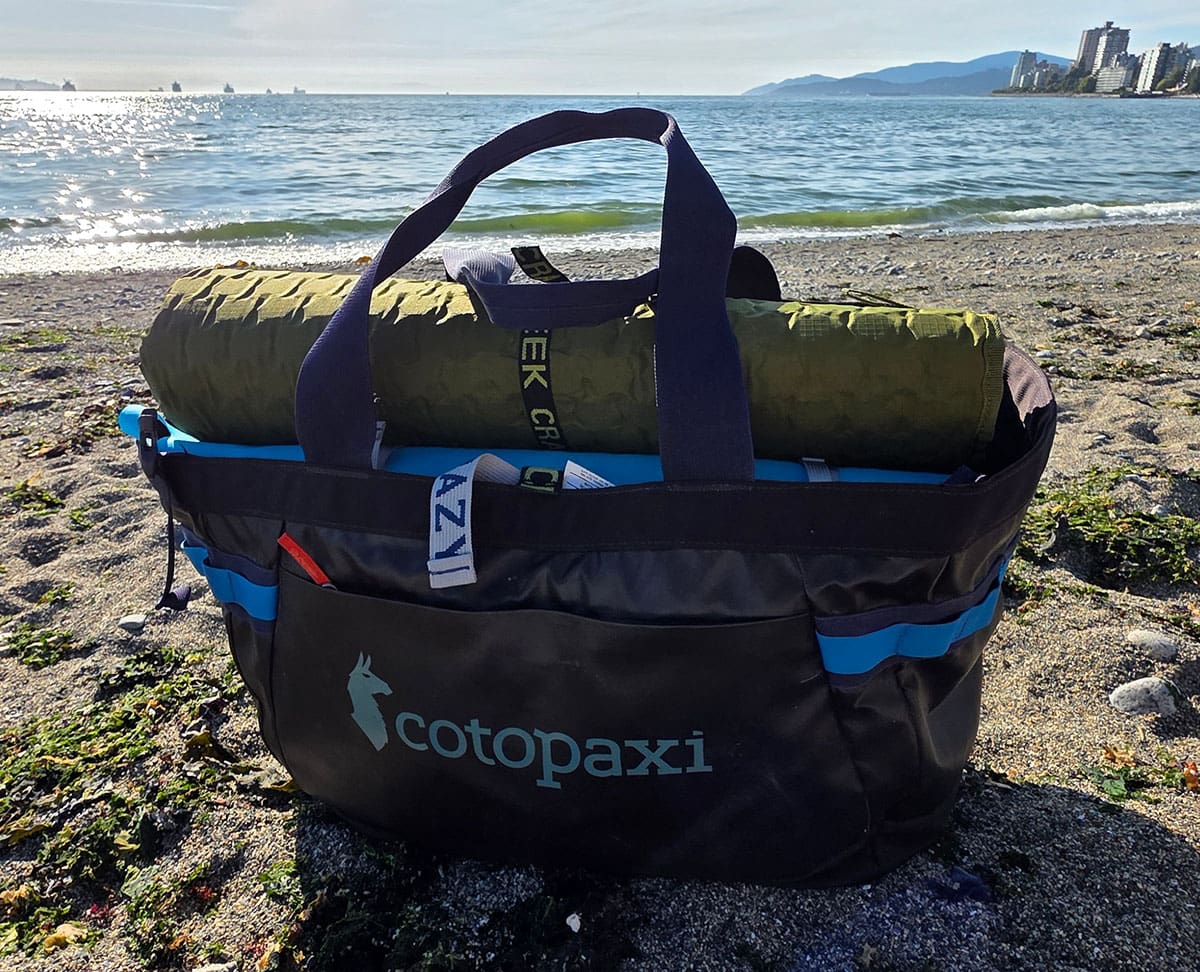
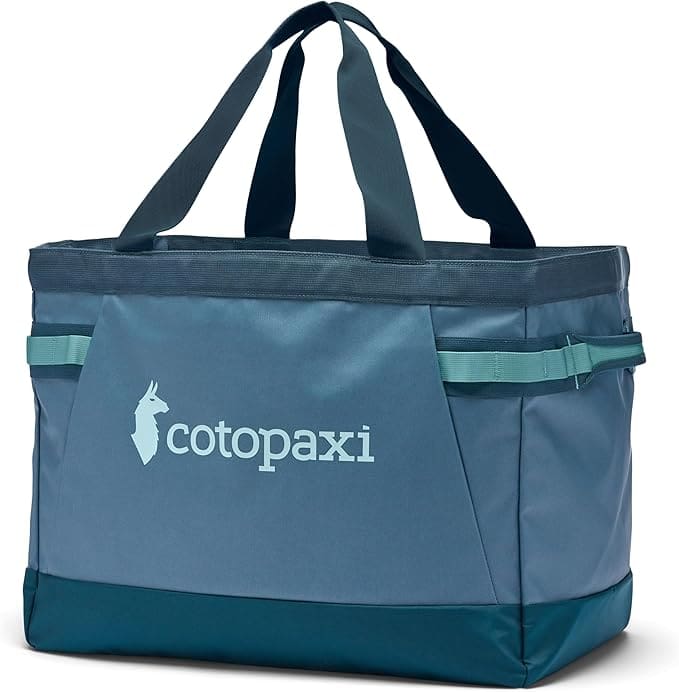


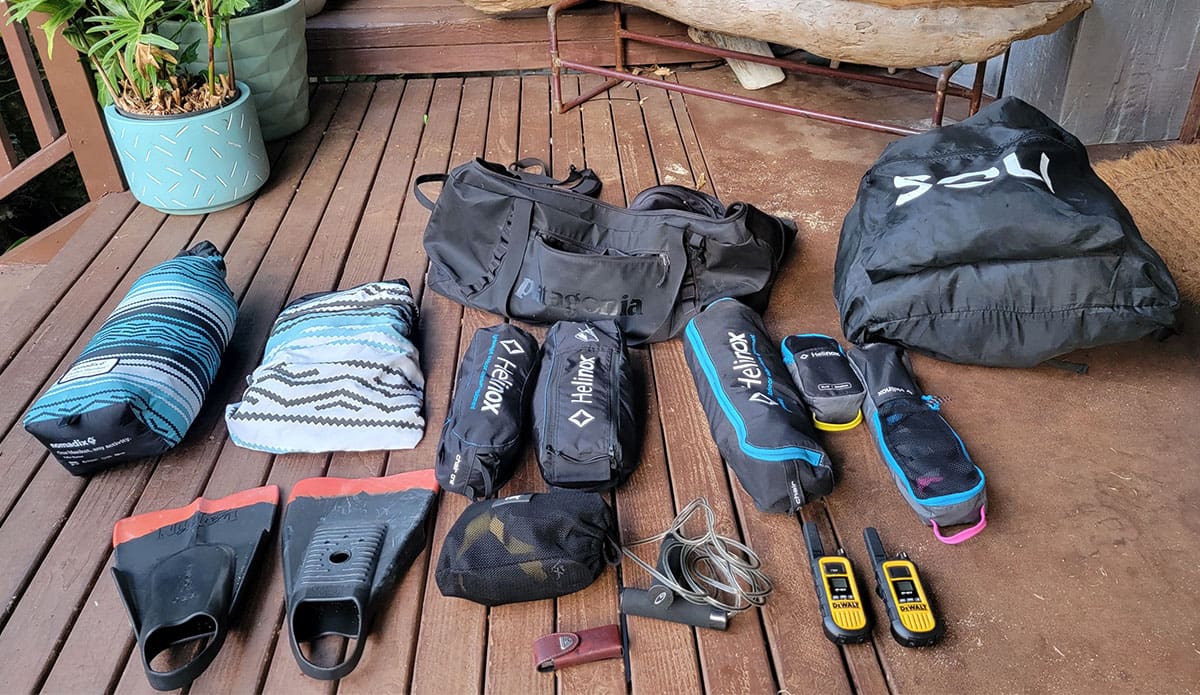
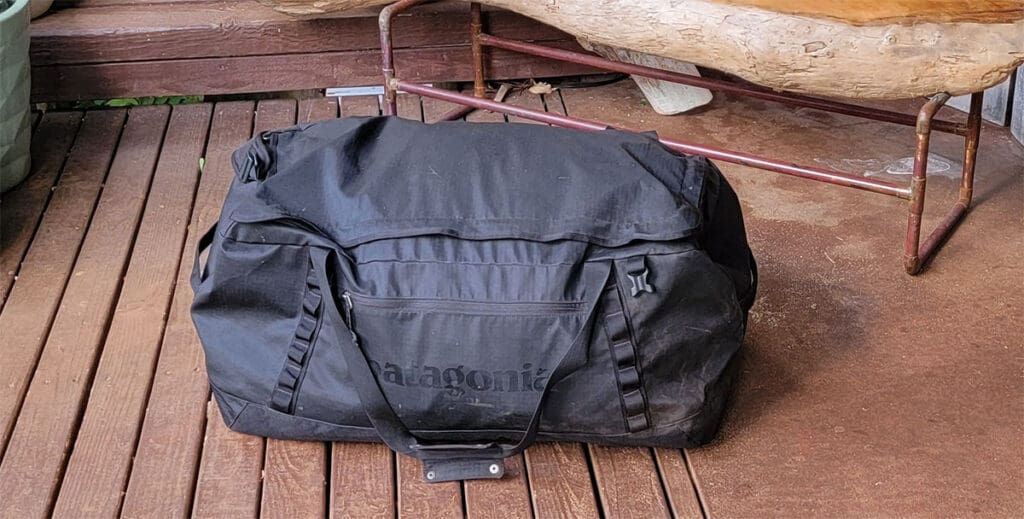
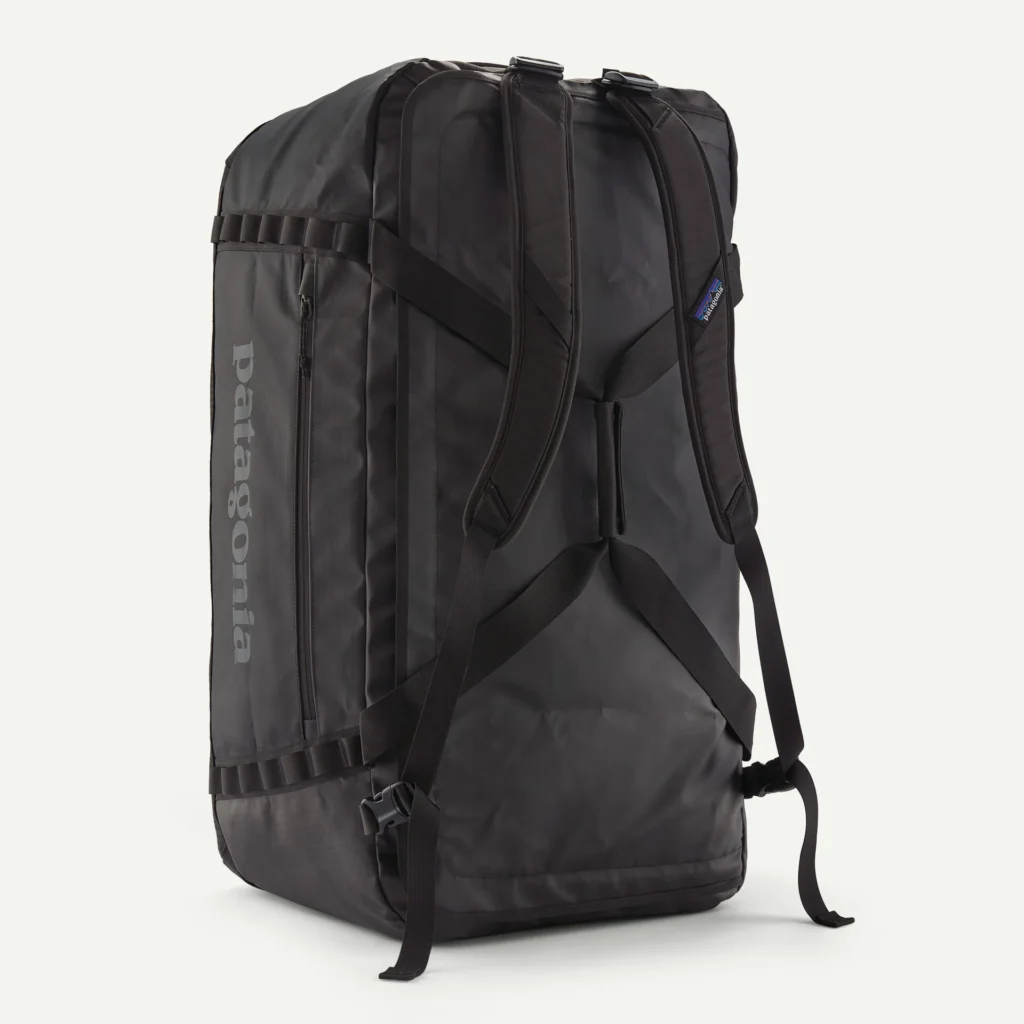
![the helinox chair one [re] for beach days](https://excellentfamilyadventures.com/wp-content/uploads/2026/03/Helinox-chair-one-re-835x1024.jpg)